Abuse My Nipples Dot Biz
RetroPie Setup Guide
Although emulation has been a thing since I was using old 3.5" floppies and AOL "Free Trial" CDs to build makeshift shrines to the elder gods (I was a weird kid), it has only recently entered into the mainstream as technology has advanced and the 90's nostalgia craze has really kicked in to high gear. Perhaps the biggest quantum leap in the field of retro gaming has come in the form of a palm-sized computer called a Raspberry Pi and an operating system called RetroPie created with the intent on making emulation more readily accessible to the general population than ever before. This is, of course, relatively speaking - "readily accessible" still means dealing with Linux on a base level and most people still burst into flames at the idea. So this guide will walk you, step-by-step, though setting up your very own RetroPie.
Step #1: What You'll Need
REQUIRED
- Raspberry Pi
- HDMI cable
- Micro SD card (w/ card reader)
- RetroPie
- Win32 Disk Imager or AnyBurn
- USB keyboard (setup only)
- USB controller(s) or console controller(s) w/ USB adapter
- Home Wi-Fi or an ethernet cable
- ROMS
REQUIRED (Playstation only)
- USB drive (recommended: 32GB or higher)
- PSX BIOS (Google "SCPH1001")
- AnyBurn (see above)
- CUE Maker
- ECM Tools
OPTIONAL
- Notepad++ or any other text editor (Notepad is not acceptable)
- Photoshop/Paint Shop/GIMP
- Open Office or any other spreadsheet program
- Steven Selph's Scraper
For the Raspberry Pi itself, the basic Canakit should be all you need depending on your situation. The complete package also contains an HDMI cable, a micro SD card w/ reader, and a case, and is more cost-effective if you don't plan on getting a more stylized case and are lacking all of the other components.
Regarding the choice of case, I have built two RetroPies - one using the NES-style case linked to above (and pictured below) and one using the stock Canakit case. I have found the "Old Skool" case to have poorer ventilation than the Canakit one and it has been the one more prone to overheating, even when I'm not stressing it, unless I remove the top of the case. And while a standard pi case is designed with an easily-removable top for just this scenario, the retro case is screwed on. Aside from that, it also feels a lot more cheaply-built than it looks and I cannot in good faith recommend it.
UPDATE: since the writing of this article, Canakit has released their own NES-style case with better ventilation, but I have not tested it myself. I also do not recommend the use of its (included) SNES-style controllers for reasons I'll explain below.
 Pictured: what you'll need
 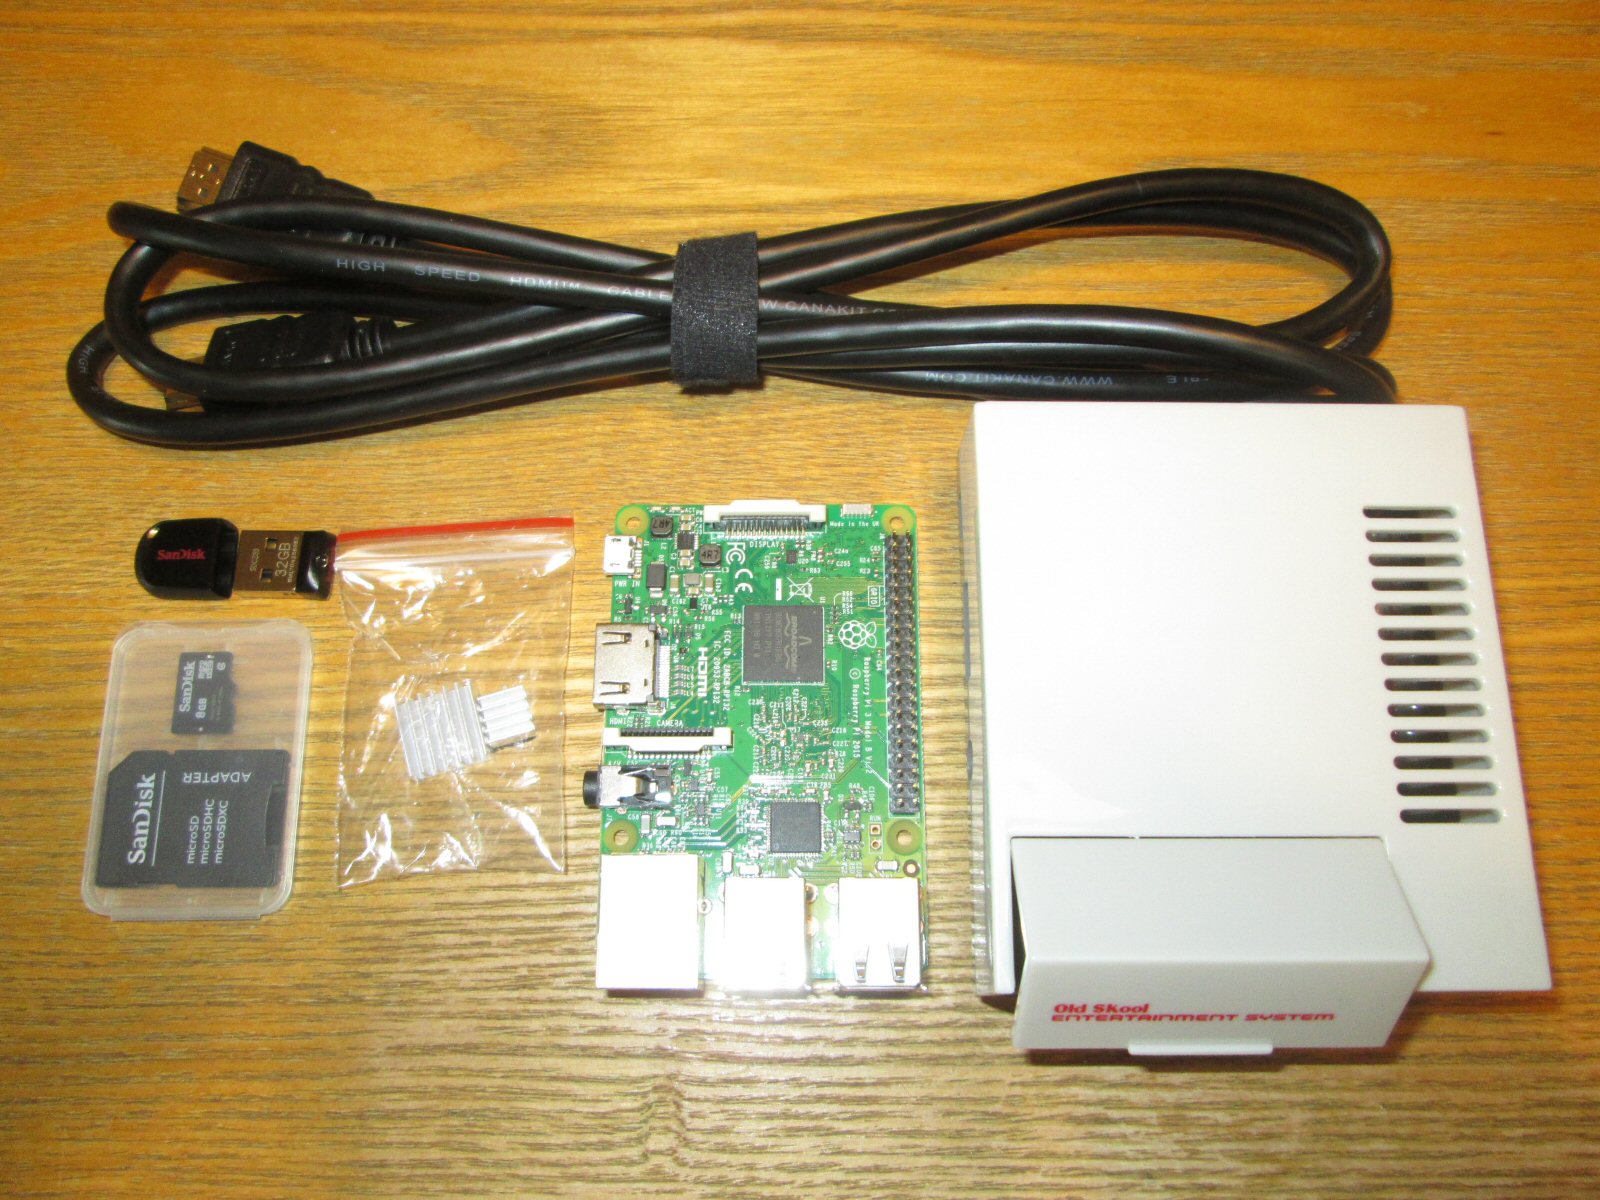 Now to take it out of the box...
  The
Ultimate NES Guide is optional
The
Ultimate NES Guide is optional An optional but highly-recommended upgrade is a power supply with an on/off switch on it. Because a pi has no power switch, it is turned on by unplugging the power (if applicable) and plugging it in. As you can imagine, this is a significant hassle if the pi is not in an easily accessible place, and the constant wear and tear on the USB port isn't great for it.
UPDATE: it seems that the Canakit people caught wind of the above issue, because my more recent purchases from them have included an "on/off" switch for the power supply, even though it was not pictured in the Amazon listing. You may want to hold off on the above until your Canakit arrives, or at the very least be prepared to return it if you don't need it.
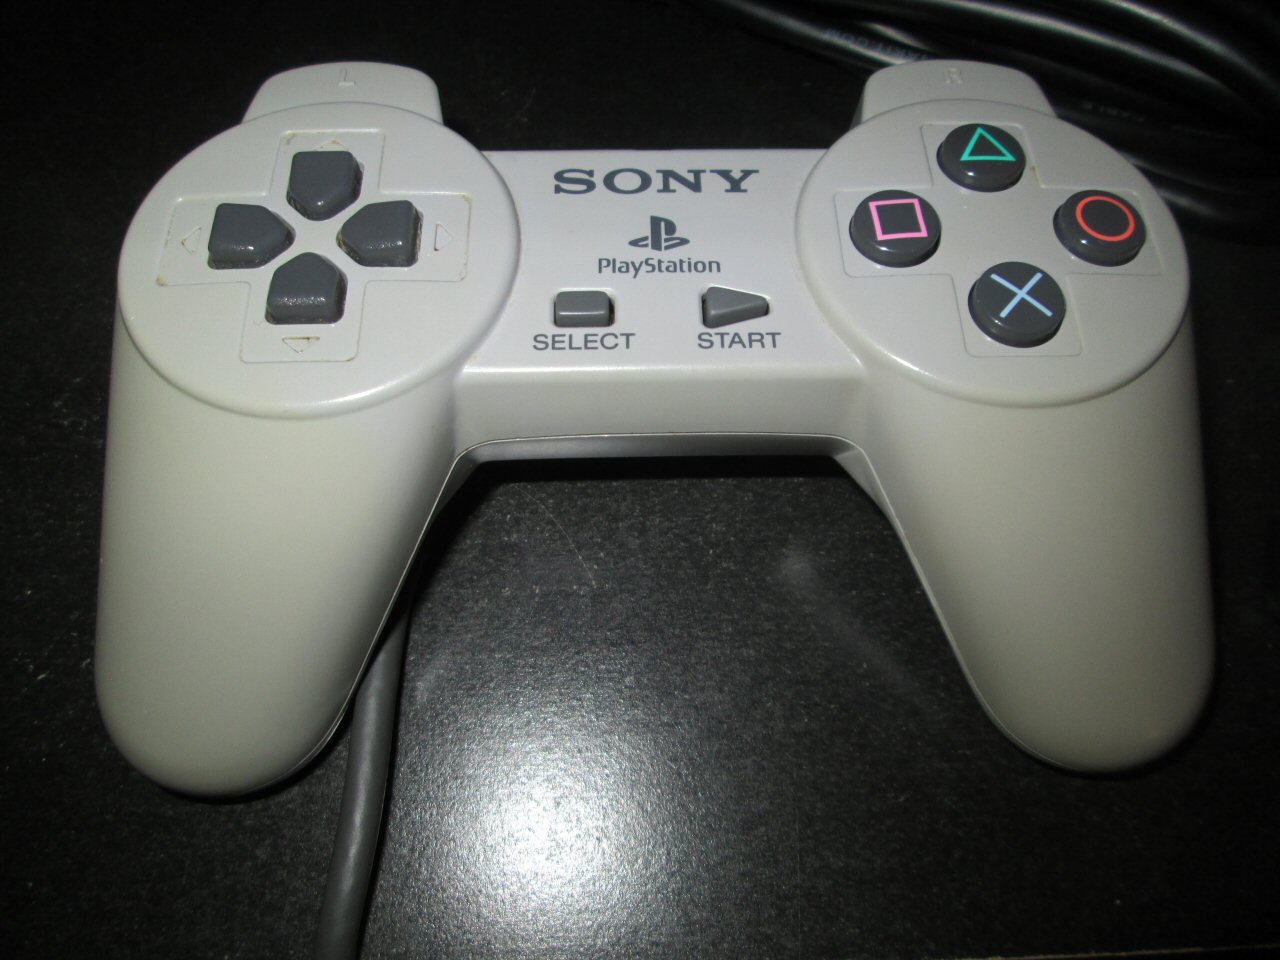
For controllers, Playstation is recommended. SNES controllers have more "retro" appeal, but you'll need the extra buttons if you intend to do Playstation emulation and Xbox controllers are unacceptable because Microsoft sucks huge donkey dick. Note that all emulator functions such as savestating and exiting the current game are activated by pressing the Select button (by default) in combination with other buttons, so no additional controller real-estate is required due to that.
You'll also need somewhere to put your system, of course. This shouldn't be a problem at all since one of the Raspberry Pi's most notable features is its compact size (see below). In fact, the size can actually be somewhat problematic - I recommend using Velcro to keep the damn thing from being pulled off whatever surface it's on by the weight of the controller cord.


Step #2: Assembling The Pi & First Run
First, assemble your Pi. This part is easy since all it involves is attaching the heat sinks to the CPU and GPU (the only two parts of the pi motherboard that are the exact size and shape of the provided heatsinks)...
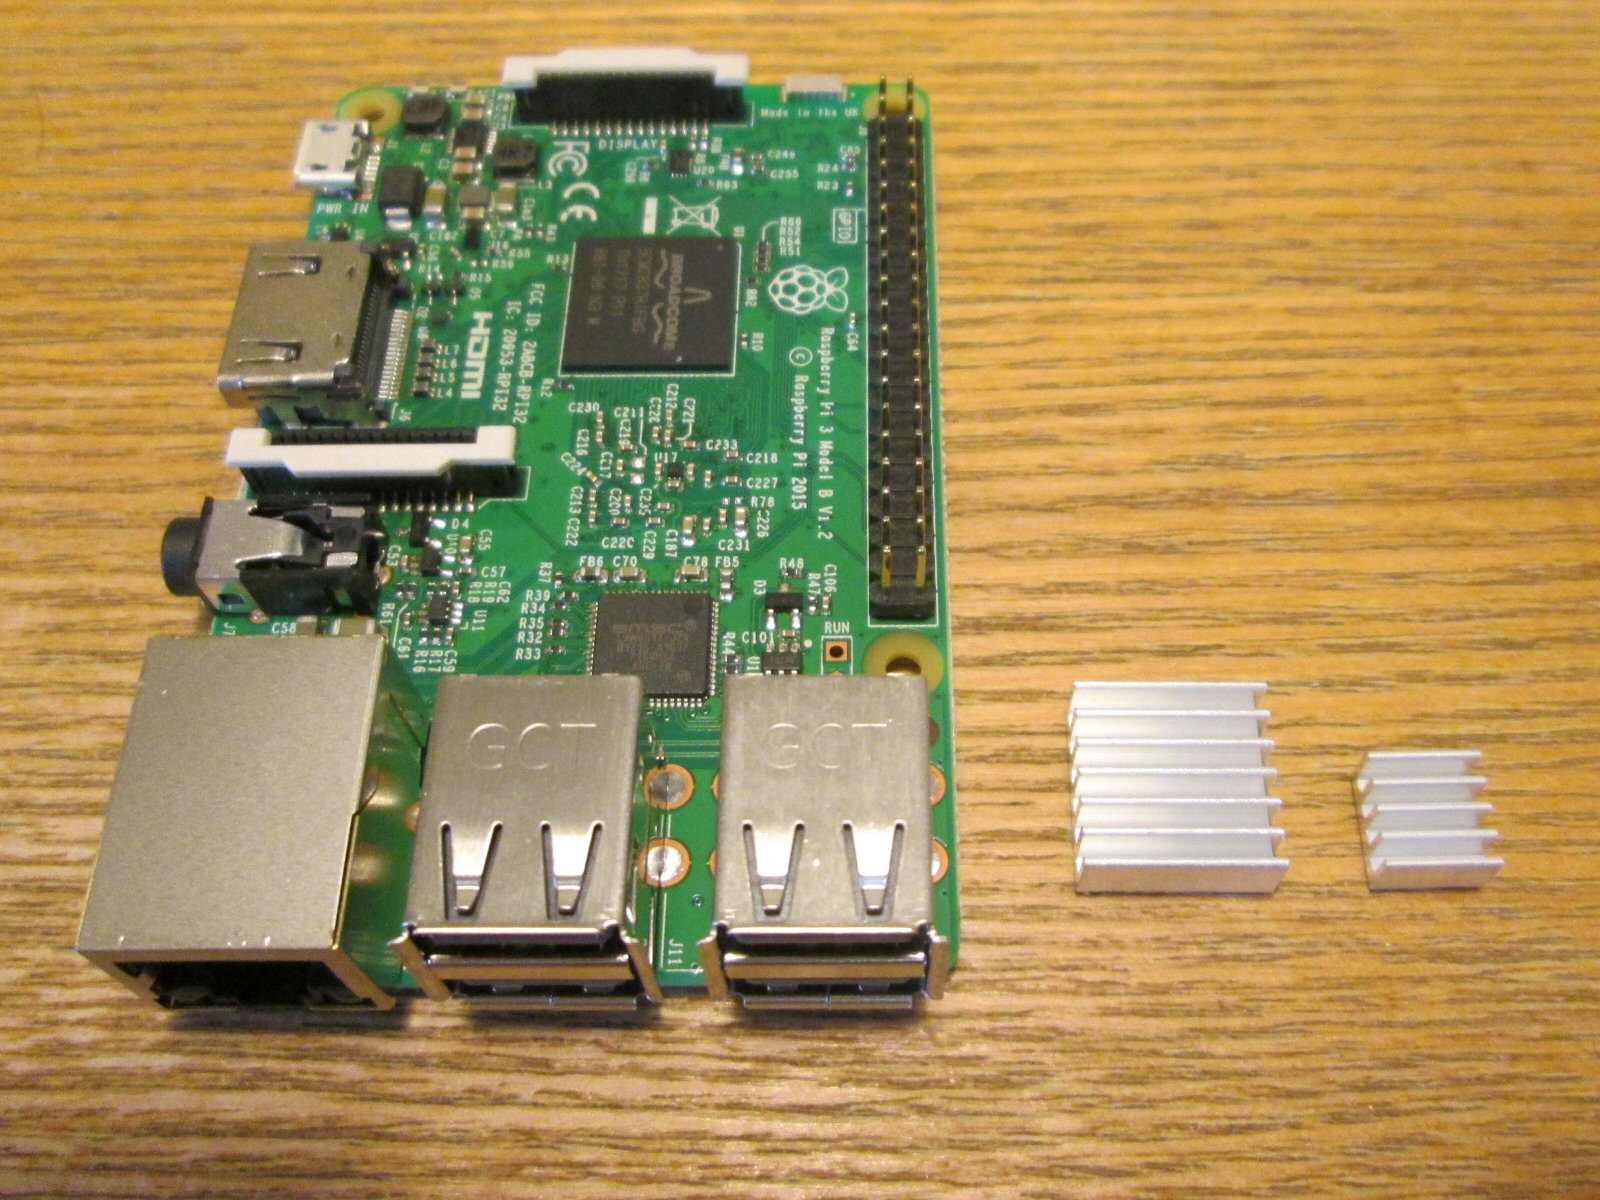 Raspberry Pi with heat sinks
  Just peel off the bottom like so...
 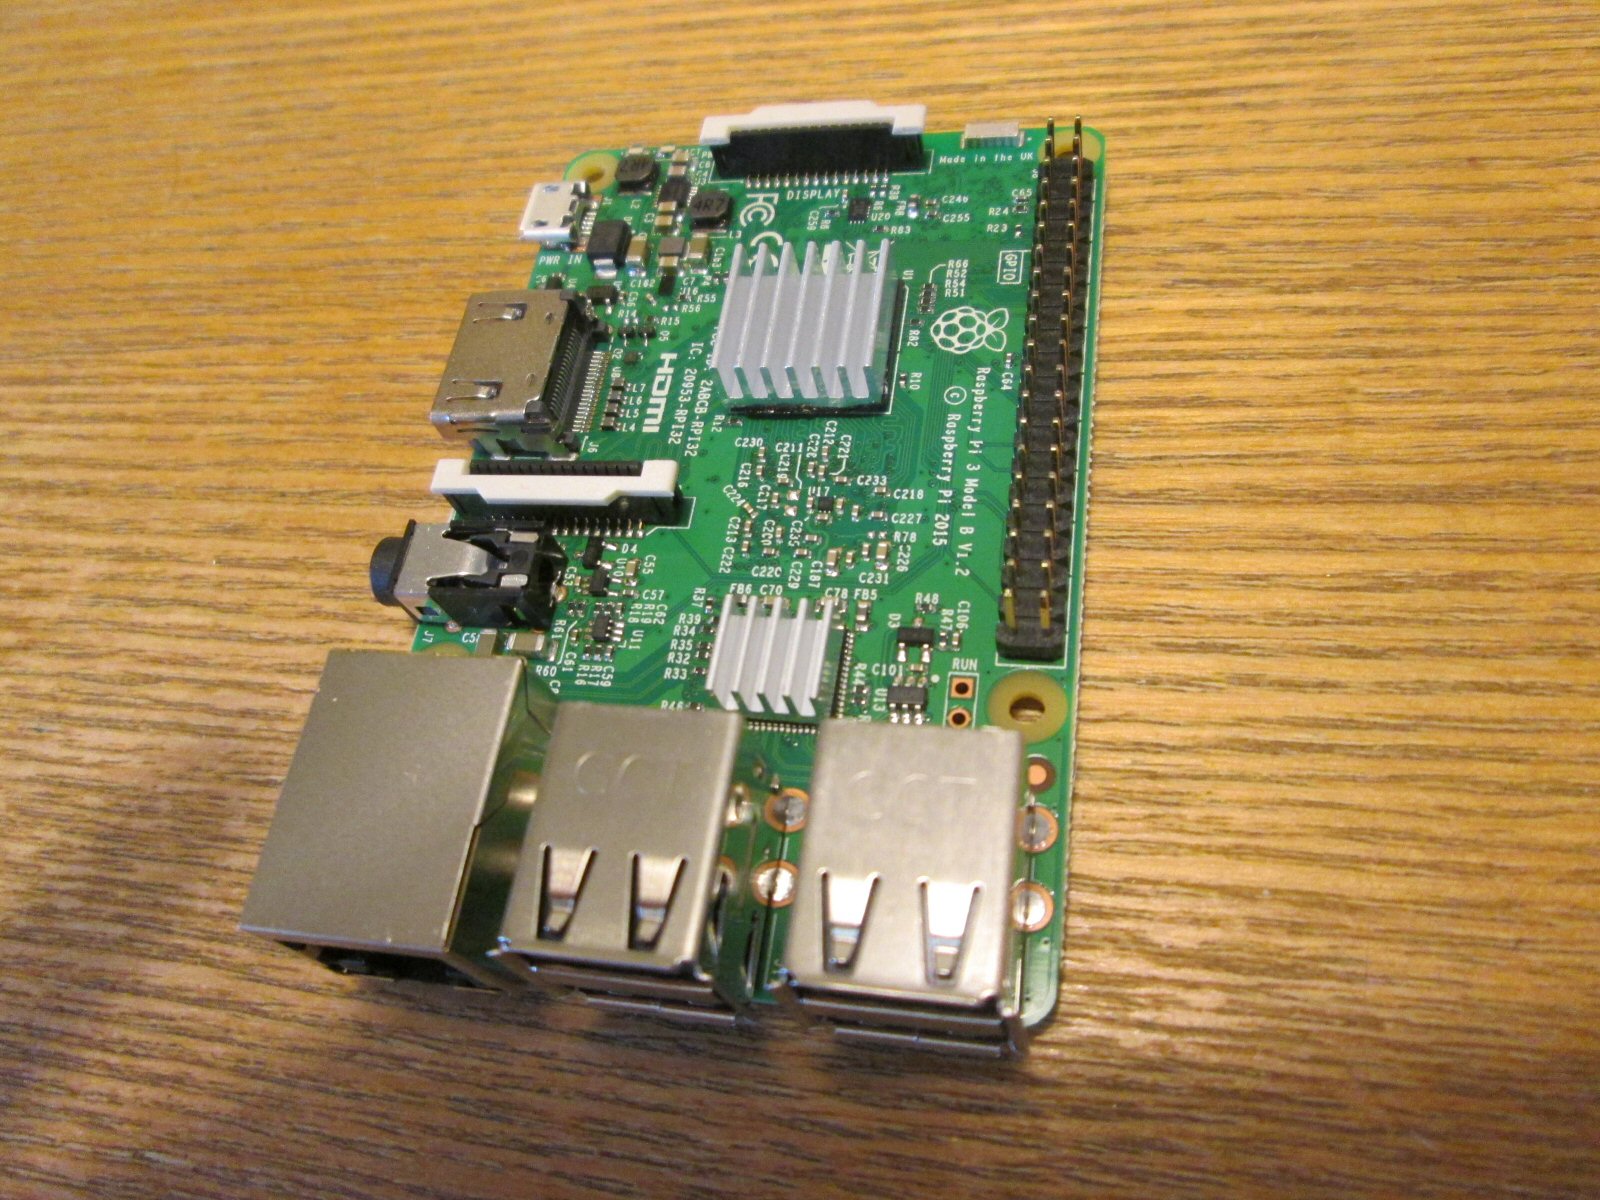 ...and attach as shown
 ...and then placing it into the case. This step will differ depending on the style of case you've chosen, though none should be too Lovecraftian to figure out. Protip: if you're like me and are already five beers in before you started this, a pair of tweezers can help get tiny screws into their holes (hehe... I said "holes").
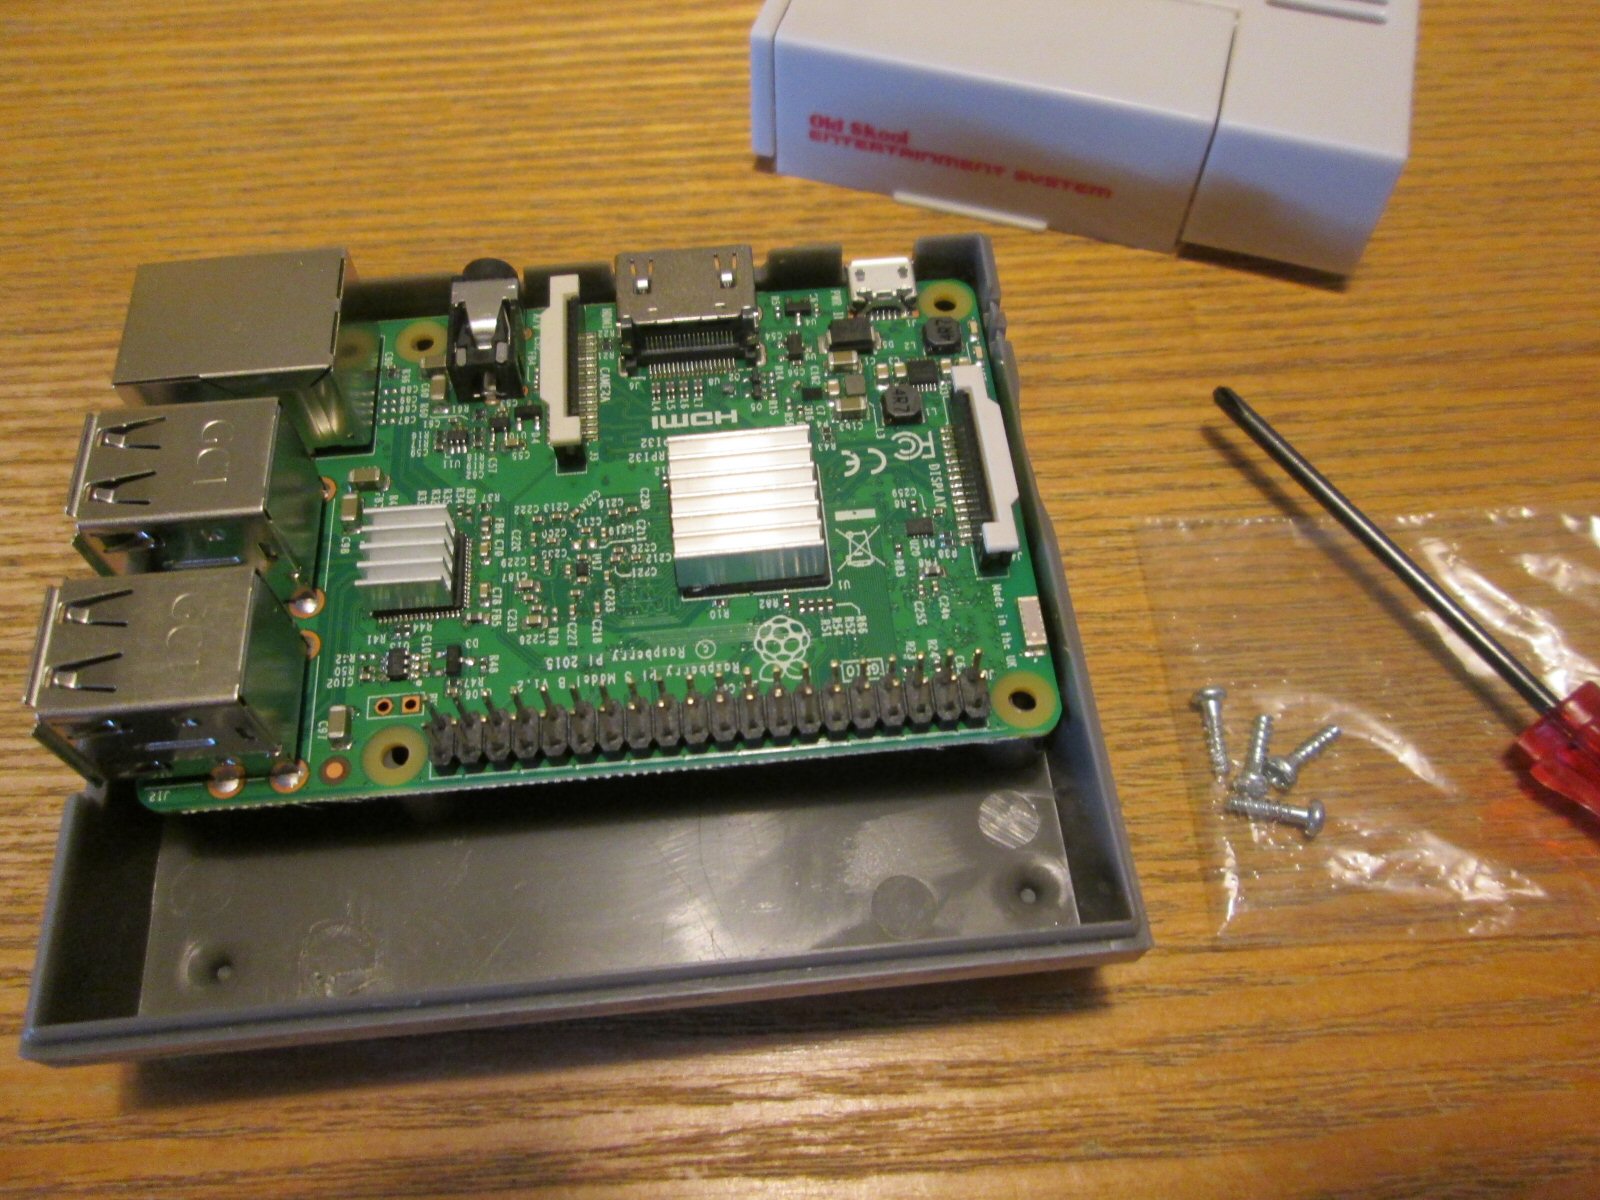 Line up the screw holes on the Pi and case
  Put the top on...
 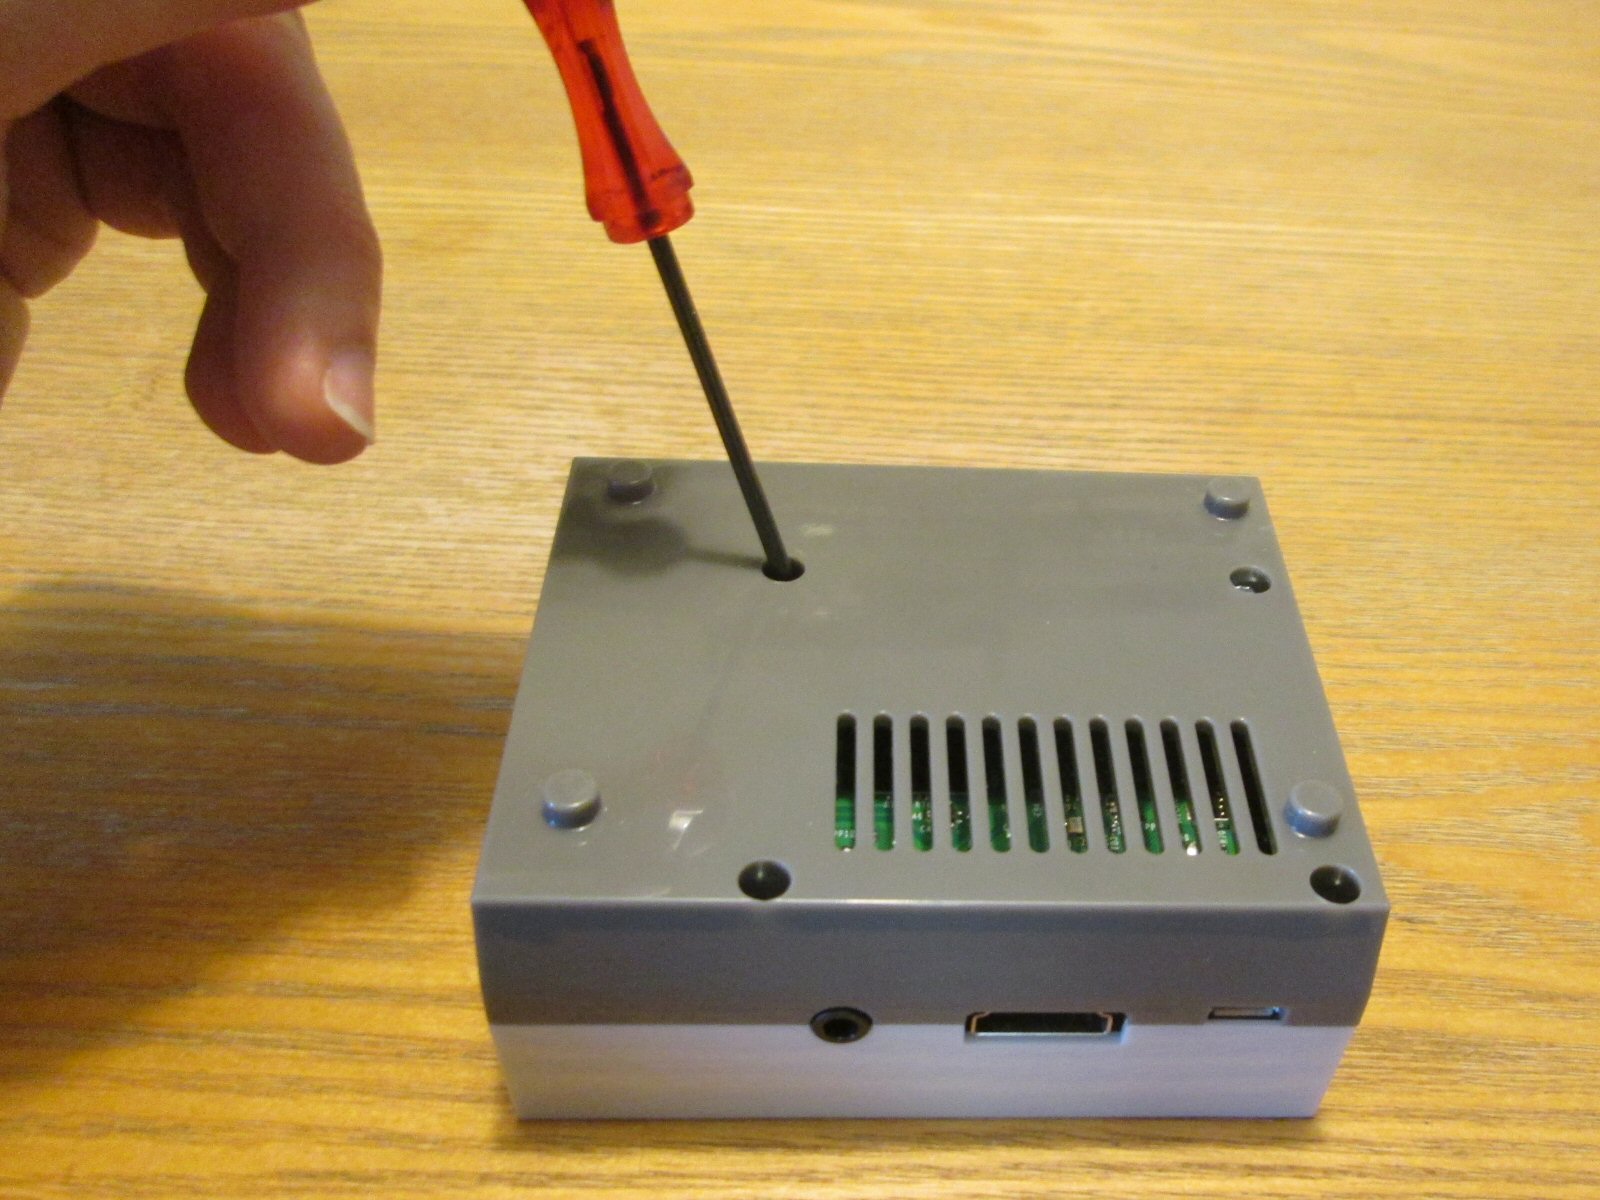 ...and secure from the bottom
 Next, we need to flash the SD card with the RetroPie OS. A Raspberry Pi has no internal hard disk, so the micro SD card is what it will boot from. Use a card reader to plug the micro SD card into your PC/laptop, and then use Win 32 Disk Imager or AnyBurn to write the RetroPie .img file to it. When the card is imaged, place it into slot in the back of the Pi as shown.
 Contacts on the card should face up, not down
 Plug your controller, keyboard, and (if you have one) USB drive into the Pi and then power it on by plugging it the power adapter (you'll also need to plug it into a TV or monitor with the HDMI cable if you actually want to see anything, but we're going to assume that you're not a complete retard and knew that already). RetroPie is configured to automatically boot into EmulationStation - the front-end interface for RetroPie's emulation - and it will prompt you to configure your controller when it first runs. Follow the on-screen instructions, holding any button to skip an input and pressing whatever you have mapped to "A" when finished to move into the main menu.
Now that we're inside, we'll enter the RetroPie setup menu (which should be the only one available right now since we haven't loaded any ROMs yet) and go to Wi-Fi. Select your home network (or your neighbor's if you're stealing their Wi-Fi) and enter the network key. Once it connects, you will then be able to access your Pi on your home network via \\ retropie. Optionally (or mandatorily, if you have another Pi on your network and want to avoid conflicts), you can go into the Raspberry Pi Configuration Tool from the setup menu and change the hostname to whatever you wish. We'll be doing most of our work over Wi-Fi since it's much faster and easier than using RetroPie's interface.
If you only plan on emulating 4th-gen consoles (SNES/Genesis) and prior, then the available space on the internal SD card should be more than sufficient for your needs and you can skip to the next step. If, however, you intend to emulate Playstation games or simply want to run games from a USB stick for ease of transfer/backup/whatever, then we want to transfer the entire RetroPie file structure over to the USB drive. We'll assume that you've already removed any pre-existing shovelware from it, so just follow the instructions in the provided link. Remember that Linux is case-sensitive, so you'll get an error if you try to move /home/pi/Retropie/* instead of /home/pi/RetroPie/* and setting the wrong directory to mount on boot will just get you a message saying that no systems exist.
With the entire RetroPie file structure now residing on the USB drive (the micro SD card is now functioning solely as a boot disk), we now have a much easier method of loading ROMs onto the pi since we can simply place them on the USB drive rather than using it as a transfer medium or by using Wi-Fi. Note that we still must use Wi-Fi for configuration purposes, however - the USB drive can only be used on your laptop/desktop to add ROMs.
Step #3: Loading ROMs
If you haven't transferred your RetroPie file structure to a USB drive, the easiest way to load ROMs is over the Wi-Fi network: just copy them to the appropriate system folders inside the "roms" directory. If you have, then just plug the USB drive into your computer and move your ROMs into the "roms" folder on it. In either case, this is a very easy step for most systems since all you need to do is initiate the file transfer and then go have a wank while everything is copying over.
(Note: RetroPie will pre-populate the ROMs directory with subfolders for all supported emulators; you are free to delete any of them that you won't be using)
Playstation
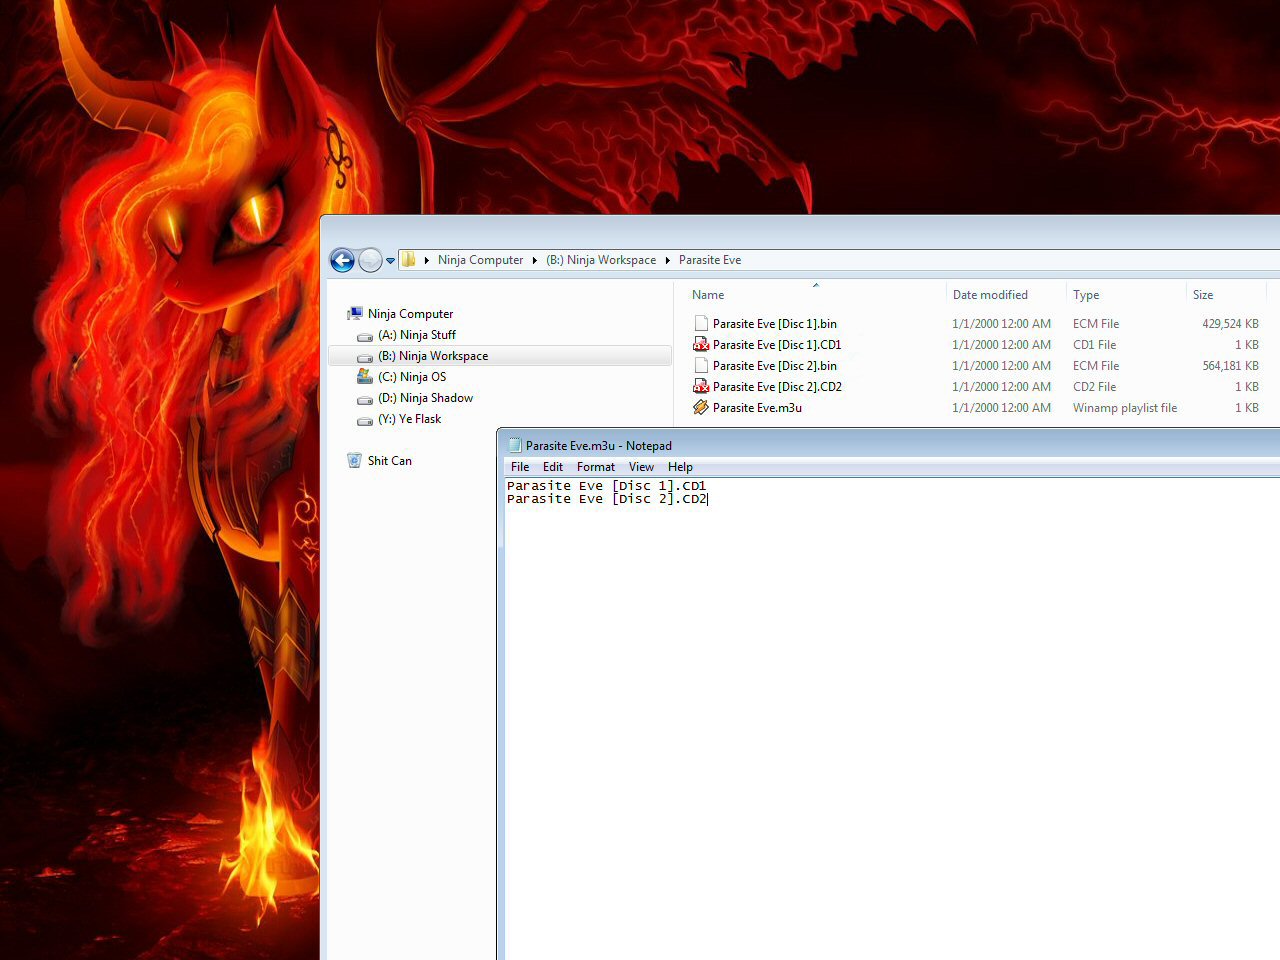
Playstation ROMs are the only real point of complication due to the various formats they may come in as well as the prospect of multi-disc games. The most common formats are .bin/.cue and .img/.ccd/.sub, with the former being preferred due to superior compression. Either format can be made to load multiple discs at once (i.e. Final Fantasy VII, Final Fantasy VIII, Final Fantasy IX), by changing the .cue or .ccd extensions to .CD1, .CD2, .CD3, etc. and then creating an .m3u (plain text) file that lists one of the renamed files per line (see screenshot below) and inserting it into the gamelist (explained in section four). When the game prompts you to change discs, you can do so through the Retroarch menu (see section six). Do not use this method with a game like Resident Evil 2, where which disc you begin with determines the scenario.
This guide will assume that you are using AnyBurn to legally rip games that you already own, in which case you'll want to rip as .bin/.cue for the reasons stated above. If you happen across a .bin file that, say, fell off the back of a truck and is missing its .cue file, then you can use CUE Creator to generate one. You may also acquire compressed bin files with the .ecm extension, which can be uncompressed with ECM Tools. Note that you can also use ECM Tools to compress your .bin files before adding them to a .rar or .7z archive for backup purposes; the combined methods will generally reduce a .bin file to 20%-50% of its original size depending on how much of its data is FMV (*cough* FINALFANTASY *cough*). Although AnyBurn has a feature that will convert between file types (i.e. .img -> .bin), my experience is that the resulting file is always corrupt and will not load on any emulator.
 Just drag the compressed file onto the "unecm" executable...
 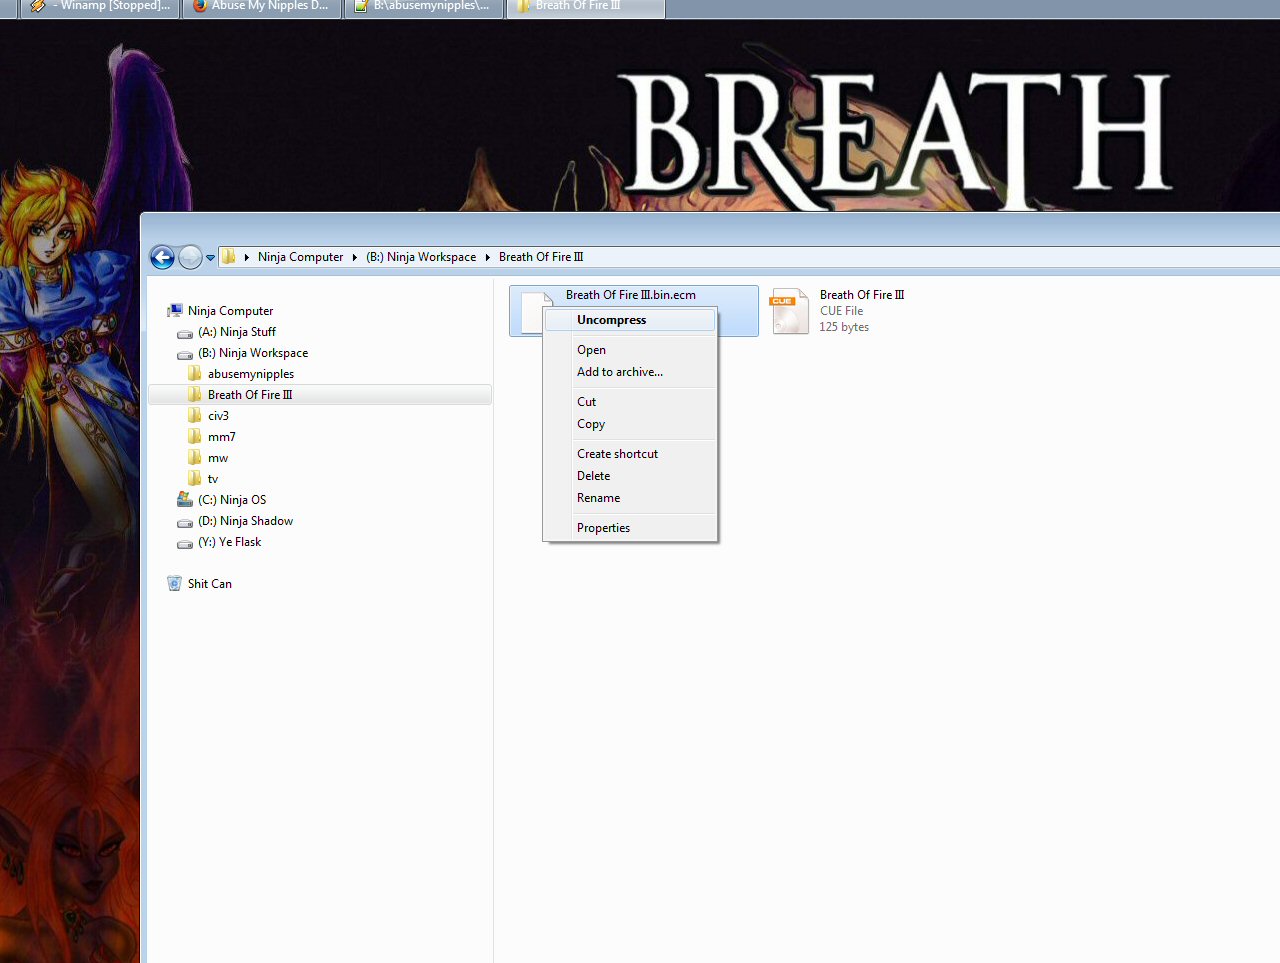 ...or use this hack
I made to add the option to your right-click menu
...or use this hack
I made to add the option to your right-click menu The final step for setting up PSX emulation is a very easy one: just take the BIOS that you "found" on the side of the road and place it in \\retropie/bios. The only game to my knowledge that won't work without it is Metal Gear Solid, although every other game will give you an error message stating that the BIOS wasn't found and to expect errors.
Speaking of Metal Gear Solid (AKA "Metar Gear Soriduru"), it is the only Playstation game that I cannot recommend playing on a RetroPie for performance reasons - at least without Overclocking it. Although perfectly and technicaly playable, the game will exhibit moderate to severe slowdown during 3D processing. For a clear example of this, switch to first-person view during an explosion and watch the game slow down to a crawl. More damningly, it also affects the majority of the game's cutscenes to a detrimental point - the hard-hitting drama and batshit craziness of Hideo Kojima tends to be lost when all of his characters speak like a bare-knuckle boxer with a massive head wound.
Regional System Variants
As any amount of Googling may have clued you in to, the Raspberry Pi - and along with it, the RetroPie project - was born in the land of tea, crumpets, and unflinching guards in funny hats. That's why the Sega Genesis is called "MegaDrive" and why the screen just says "bollocks" whenever you fuck something up instead of giving you a real error message. Fixing this would be discussed further down below since it's technically more of a bit of fine-tuning, but we want it done before we start scraping ROMs so that the box art doesn't all just come back as pictures of the queen.
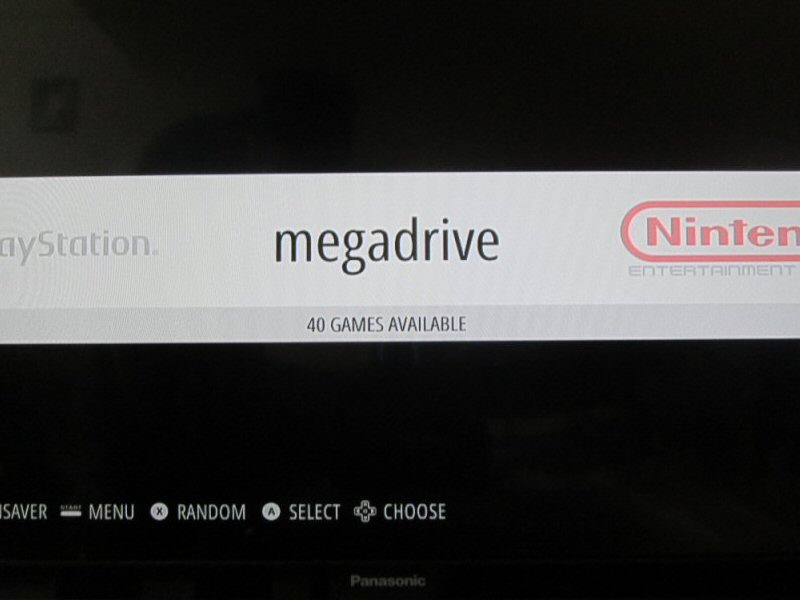 What is this shit? Do I need bangers and mash to play it?
  Much better
 To fix this, create a text file in \\retropie/configs/all named platforms.cfg with the following content:
According to the official RetroPie documentation, you should update any installed Genesis emulators after creating this file (RetroPie Setup -> manage packages -> manage main packages -> genesis plus / picodrive -> update from source) and everything should work, the Genesis logo should show up in place of the MegaDrive logo, and you won't get any limey box art. This did not work for me, possibly because of the order I did all of these steps in. If it does not work for you, just keep on reading (just skip scraping Genesis games for now) and we'll fix it later.
Step #4: Scraping ROMs & Gamelists
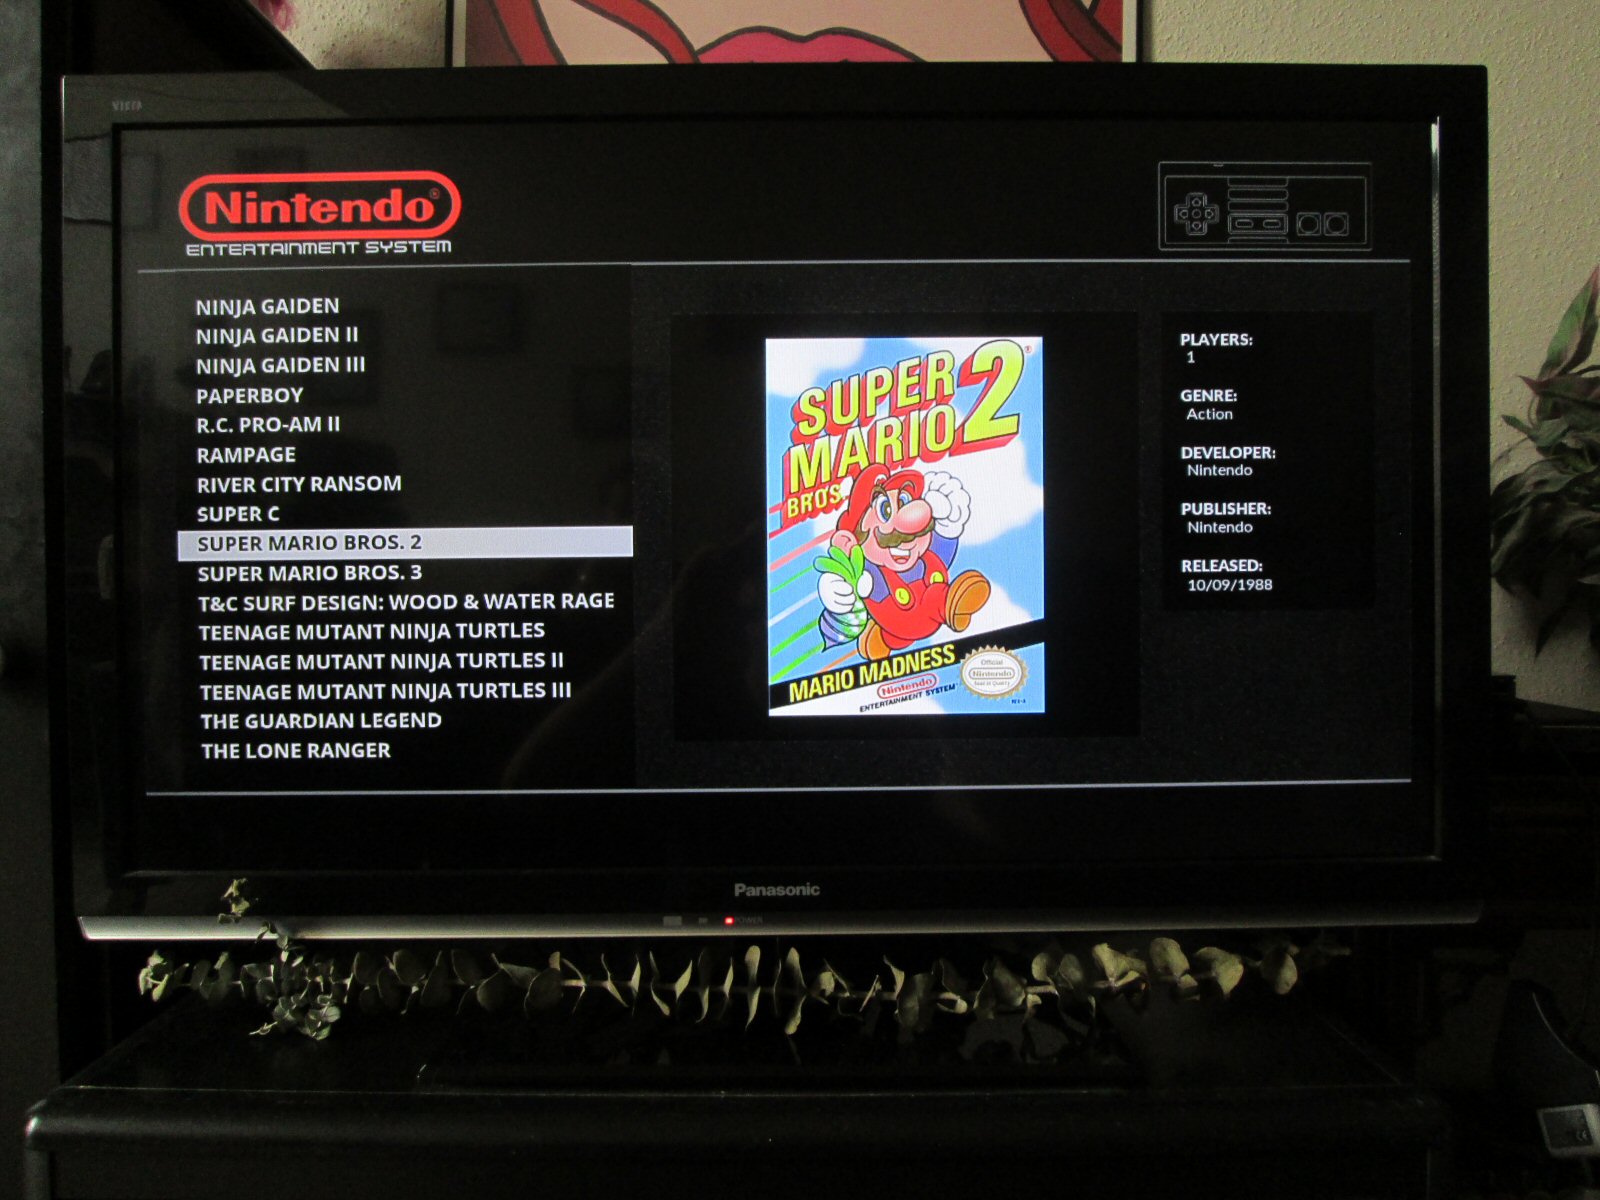
"Scraping" refers to the process of analyzing ROMs and then gathering metadata (release date, genre, developer, etc.) and box art from an online database for display purposes. Depending on which theme you select (see step #5 below), you may end up using some, all, or none of this data. Most themes will at least use the box art, however, so let's start scrapin'.
(Disclaimer: the online databases used by the scrapers discussed below have an unfortunate tendency to go down a lot. Your best recourse in this case is to just skip to the "editing gamelist files" below and fill out the metadata yourself, which you'll probably want to do anyway if you're like me and get annoyed at the inaccuracy of a lot of what you'll scrape up.)
You have two options for this process: use EmulationStation's internal scraper by pressing start in the main interface to pull up the options menu, or download the scraper linked to at the beginning of this tutorial. The internal scraper is more convenient and will acquire higher-resolution images for box art than Steven Selph's scraper will. However, you will need to shrink these images in Photoshop because they will be large enough to significantly slow down the game selection interface (I would not recommend either dimension be higher than 800). Conversely, the smaller images scraped by Steven Selph's program will exhibit slight "snap to" movements when browsing due to not being large enough, so Photoshop is recommended either way and you might as well start out working with the higher-quality images.
One problem of specific note with the EmulationStation's internally-scraped box art is the lack of consistency in the chosen format. Many of them will come as .png files, which is a terrible format for box art, particularly as the significantly larger filesize is a significant contributor to the lag you'll experience while browsing if you just take EmulationStation's scrapes as-is (compare the size and quality of these two images). PNG has its place, of course, but it isn't here.
Scraped images are placed in: \\retropie/configs/all/emulationstation/downloaded_images
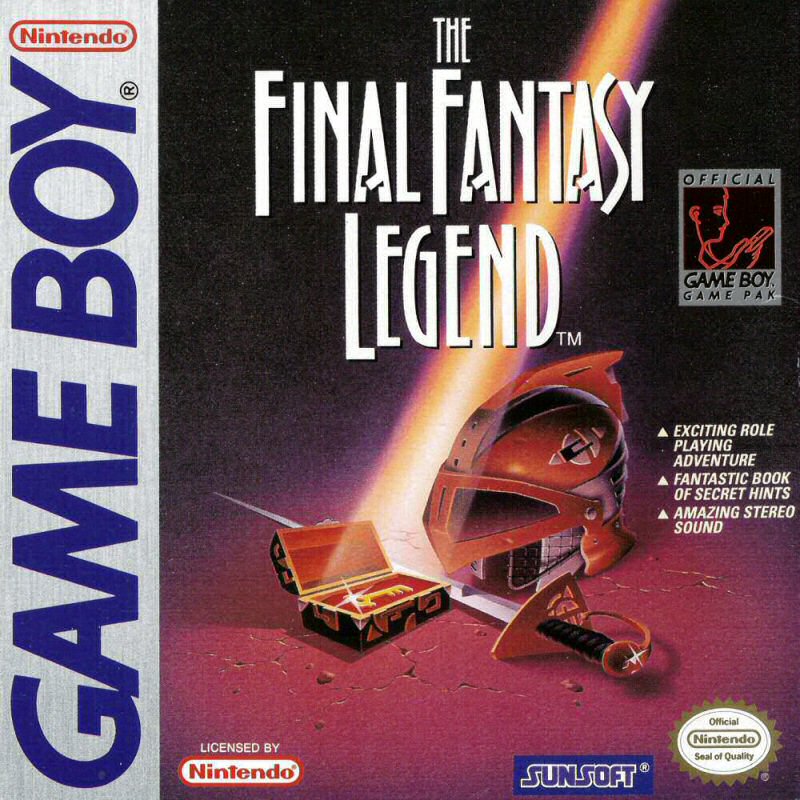 GB/PSX: 800x800
 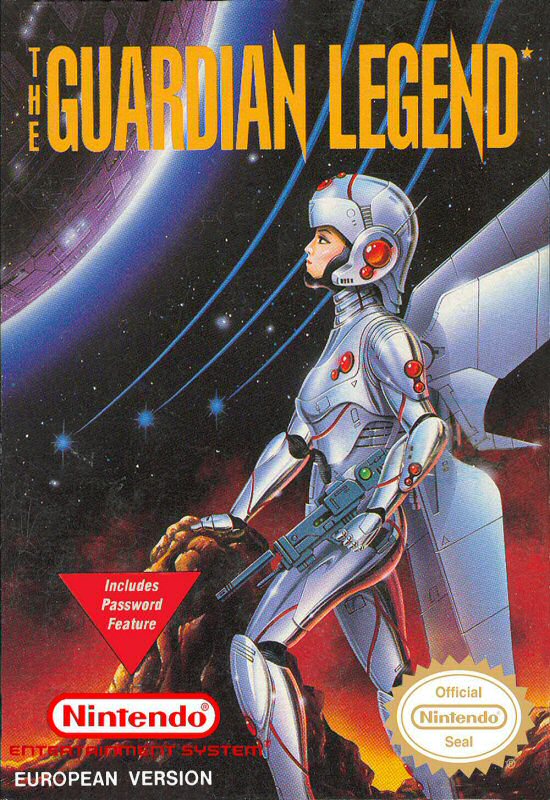 NES/SEGA: 550x800
  SNES/N64: 800x550
 If you'd like to save some time on this step, feel free to download my box art collection below. If you're wondering where my Final Fantasy III box art comes from, it's courtesy of Retro Game Cases for my Brave New World mod.
Regarding Steven Selph's scraper, its primary advantage - and the reason I mention it - is that it can be used to scrape games that EmulationStation's internal scraper can't find. To use it, extract it to any folder you wish on your PC/laptop and place the ROMs you want scraped in there with it. Open up a command prompt in that folder (shift + right-click on the background in Explorer to make the option appear) and run the following command: scraper -missing derp.csv
The scraper will then generate a gamelist.xml file for ROMs that were successfully scraped and a .csv file named "derp" containing the hash of every ROM that wasn't. Assuming that any ROMs were successfully scraped, rename the gamelist file and set it aside. Now, open up derp.csv with the spreadsheet program of your choice that isn't Excel because fuck Microsoft and look up each game shown on the list at http://thegamesdb.net. For each game, copy the number in the URL into column "D". When you're finished, move the contents of columns C and D (the only two that the scraper will actually use) over to A and B, respectively, and then fill up at least one row in C and D with whatever rubbish you wish (the scraper still needs the .csv file to have four columns) and save it.
Now, head back to your command prompt and run: scraper -hash_file derp.csv
After that finishes, you will have an .xml file (possibly two if your first scrape yielded anything) containing all of the metadata form your remaining games. Now, we will merge this data with the existing gamelists on your Pi, which can be found in: \\retropie/configs/all/emulationstation/gamelists
Editing Gamelist Files
Editing .xml files is where having a "real" text editor like Notepad++ comes into play, as just regular Notepad won't parse the line breaks correctly and so everything will just show up in one line longer than the one outside the unemployment office in Detroit. It also does syntax highlighting for opening and closing tags, which is very useful for navigating and making sure you're copying over everything you're supposed to. A typical entry in a gamelist looks something like this:
It's important to make sure that each game's closing tag comes before the opening tag of the next (the actual order of the games doesn't matter) and that every game is contained within the <gamelist> tags that open and close the file. It's also important to make sure that the path and image tags are pointing to the right place, which they probably aren't for anything you got out of Steven Selph's Scraper. For every game, the relative paths should be as they are in the above example: ./ for the ROM and /home/pi/.emulationstation/downloaded_images/(system)/ for the image. You'll also need to remember to change any .png image extensions to .jpg (ctrl+F is your friend).
(Again, remember that Linux is case-sensitive and any changes you make to file paths here must be consistent!)
Since the above comes from my personal gamelist, it's been cleaned up quite a bit. The opening <game> tag is missing the database ID since it isn't actually used by anything, the <desc> and <rating> tags are missing because my theme doesn't use them and who seriously reads any of that shit anyway, and the image filename is the same as that of the ROM instead of having "-image" tacked on to the end. I've also trimmed my release dates down to just the year and month since the exact release dates for many old games aren't actually known and/or documented (there is a pending feature request to change how EmulationStation displays the release date). Probably the most interesting thing for people who don't suffer from crippling OCD to do here is to edit the <name> tag, which is how the game will be listed in EmulationStation.
Finally, you will also need to manually edit this list for any multi-disc Playstation games that you set to load multiple discs at once by pointing the ROM path to the m3u file that you create. If you end up with duplicate game listings (one of them with metadata and one without), check back and make sure that all of the paths and extensions are correct.
Merging Backwards-Compatible Systems
The Game Boy and Game Boy Color are treated by EmulationStation as different systems because, well, they kind of are. However, because the Game Boy Color is backwards-compatible (a concept lost on today's tech industry, probably because there's no money in it), it will play regular Game Boy ROMs just fine. The only catch - and the reason we waited until now to do this step - is that EmulationStation won't look for GB roms in your GBC folder unless you tell it to. This is as simple as copying the contents of the Game Boy gamelist into the Game Boy Color gamelist (and deleting the former as it is no longer necessary) and then moving your Game Boy ROMs to the GBC folder. Note that the regular GB emulator offers the same color options as the GBC, so the only thing that you gain from doing this is removing a superfluous game system.
(Exact same deal as the above goes for Master System games on the Sega Genesis.)
Step #5: Configuring EmulationStation
Installing Themes
This is the last thing that we'll be doing under the "RetroPie Setup" menu in EmulationStation. Go to "RetroPie Setup", "Configuration/Tools", and then "esthemes". This will give you a list of themes to download and install - the snazzy one I use and recommend is called "Eudora-Concise". If you're like me and have absolutely no room in your life for things you don't use (such as your dignity), you can go ahead and uninstall the default theme ("carbon") while you're in here.
Once you have the new theme installed, it's a good idea to go ahead and copy it from its default location to a place that's a bit more accessible. Simply put, the files that make up this wonderful little wad of bits and nostalgia are located in two places: /etc/ (hidden) and /opt/ (what you see over Wi-Fi and/or on your USB drive, typically known as "samba shares"). The latter location is the first place it will look for these files, so anything that is placed in there will override what's in /etc/. We don't intend to edit our new theme (although we could if we wanted to), but this will put it somewhere that will allow us to easily back it up. Exit EmulationStation and type the command shown below.
cp -r /etc/emulationstation/themes/ /opt/retropie/configs/all/emulationstation/themes/
 Granted, the constant reminder of how old your childhood games are may not be a good thing...
 Re-Ordering Systems
As long as we're in the system shell, let's also go ahead and copy the systems configuration file over to a place where we can access it. This will allow us to change the order in which EmulationStation lists game systems, as well as to remove "RetroPie Setup" from the system list since we're done with it and we don't want anyone else fucking with it.
cp /etc/emulationstation/es_systems.cfg /opt/retropie/configs/all/emulationstation/es_systems.cfg
As with the above, what we just did was copy the system list from the second place that EmulationStation will look for it to the first place, which just so happens to be conveniently located in \\retropie/configs/all/emulationstation. Unlike games, which will display in the alphabetical order of their given names in the gamelist files regardless of how the gamelists are structured, systems will always be listed in their order of appearance in es_systems.cfg. Feel free to arrange this file to your little heart's content and even delete systems that you aren't using to keep it tidy. As for the RetroPie Setup "system", it's probably wiser to just comment it out like so:
This makes it easier for us to access in the future should the need ever arise.
Something else we can do in here is change the display names and/or themes of our systems by editing the <fullname> and <theme> tags. More to the point, if we've lumped our many regular Game Boy games in with the, like, ten or so good Game Boy Color games that were ever released, we may want the system to display with the regular Game Boy theme and logo, instead - changing this is as easy as changing "gbc" to "gb" in the <theme> tag and removing "Color" from <fullname>.
We can also go ahead and complete our earlier localization by changing the Sega Genesis to say just that (instead of Mega Drive / Genesis) because this is America and other countries don't exist. If you had problems earlier with the platforms.cfg file still giving you box art that drives on the wrong side of the road, then change the <platform> to genesis instead of megadrive. If you're still seeing the MegaDrive logo, then do the same with <theme>, otherwise leave it alone because changing it to say genesis will (probably) switch it back to the MegaDrive logo, along with a broken theme.
Once you're done dicking around with the system configuration file, type "emulationstation" into the command line or just reboot the Pi to get back into EmulationStation. You can go ahead and unplug your keyboard from it now if you want since we're done typing on it for, like, ever. Paragraphs have at least three sentences.
Disabling Runcommand
Along with removing "RetroPie Setup" from the games list, the other front-end configuration fuckup liability we'll be removing is the prompt to "press any button" to configure a ROM while it's loading. While this can, ironically, be edited in the RetroPie Setup menu, it's easier to just do it through directly editing \\retropie/configs/all/runcommand.cfg
(Note that this step isn't technically necessary if we enable "Kiosk" mode - see below.)
Other Interface Settings
Now is a good time to finish configuring the rest of the interface settings to our liking. This part is actually done more conveniently through the main interface than via the network settings by pressing Start in EmulationStation to bring up the options menu. I won't go over everything, but I have a few thoughts on certain features.
"Quick system select" is what enables you to switch between systems by pressing left or right while in the game menu instead of having to cancel out to the system menu. If you leave this option enabled, it's recommended to leave the transition style set to "fade" since "slide" looks rather janky when looping around to the beginning of the system list. Slide looks great with quick system select off, however, which I personally prefer since I find it too easy to accidentally change between systems while scrolling through game lists.
Finally, there's the "Kiosk" display mode, which hides all of the menu options except for shutdown and volume control. Once you get everything set up to your liking, this is a good feature to enable to keep anyone from mucking your shit up. Should you ever need to disable it, there is a set of hotkey commands you can enter to do so.
All of these settings are stored in \\retropie/configs/all/emulationstation/es_settings.cfg
Configuring Inputs
Finally, let's look at \\retropie/configs/all/emulationstation/es_input.cfg. This is what controls how EmulationStation (not the emulators themselves!) reads our inputs. For example, you may wish to set X (SNES "B") as the confirmation button and square (SNES "Y") as cancel instead of the old-school default A/B or Circle/X setup. Be aware that doing this will render what is displayed by the "on-screen help" interface option incorrect - that the buttons are hard-coded with SNES labels and don't change even if their function is altered is known, and apparently fixed as of February 2019.
Speaking of hard-coding, the latest version of EmulationStation introduced a shortcut key (SNES "X" by default) to a largely-unwanted - and quite frankly clunkily-impleneted - "favorites" feature. Although there is no way to truly disable it, it can be effectively turned off by mapping said shortcut to an unused (i.e. nonexistent) button on your controller.
Step #6: Configuring RetroArch
retroarch-joypads
Now, it's time to edit the controls that will be used by the emulators. Go to \\retropie/configs/all/retroarch-joypads and open the .cfg file you find inside.
If you fucked up the controller configuration when EmulationStation first loaded and haven't gone back to fix it, this is where you can do so without dealing with the cumbersome (to say the least) main input interface. Otherwise, what we're interested in here is setting the hotkey combos to our liking. This includes savestating, frameskipping, resetting, and ragequitting (AKA "exiting") the current game to return to the game menu. Hotkeys in EmulationStation are activated by holding Select (by default) and pressing another button specified in this file.
The following options are relevant to hotkeys:
- input_enable_hotkey_btn
- input_menu_toggle_btn
- input_exit_emulator_btn
- input_reset_btn
- input_save_state_btn
- input_load_state_btn
- input_state_slot_increase_axis
- input_state_slot_decrease_axis
- input_hold_fast_forward_btn
- input_toggle_fast_forward_btn
- The button to hold to activate hotkeys (default = Select)
- Pause game & enter RetroArch menu (default = Triangle/SNES "X")
- Exit to game menu (default = Start)
- Reset game (default = X/SNES "B")
- Save state (default = R)
- Load state (default = L)
- State slot +1 (default = D-Pad right)
- State slot -1 (default = D-Pad left)
- Frameskip (hold to activate)
- Frameskip (toggle)
Obviously, none of these default settings are acceptable and must be changed. Perhaps most notably, frameskipping is not available by default at all and must be manually added to the .cfg file in whichever flavor (hold or toggle) you prefer (protip: "toggle" helps avoid accidentally triggering other hotkeys while mashing through cutscenes). Further, switching savestate slots is bound by default to the D-pad, which is just bad and wrong. You can change these to buttons by changing "_axis" to "_btn" and setting the values accordingly.
The RetroArch menu option is worth special mention since it's where you need to go to change discs for Playstation games when prompted. Go to Quick Menu and then to Disc Control. From there, select Disc Cycle Tray Status to open the (virtual) disc tray, set the Disc Index to the desired disc, then select Disc Cycle Tray Status again to close the tray and exit the Retroarch menu. Other than that, this menu serves are as a front-end to adjust game audio on the fly, create per-game button overrides (which live in \\retropie/configs/(SYSTEM)/(EMULATOR)/), fuck around with filters (which I won't get into here), and to act as a handy pause button for games that are otherwise lacking one.
As for the hotkey activate button, it's ideally going to be a button that is rarely or never used during gameplay. Assuming the use of a Playstation controller, your best bet other than Select is L2, which is the least-used button by any Playstation game. If you're only putting NES/SNES-era games on your Pi, then L2 and R2 are (obviously) both completely free to use.
retroarch.cfg
This is the main emulator configuration file located in \\retropie/configs/all. It contains several options that we are for the most part interested in editing on a per-system basis, and as such we won't be doing much editing to this file directly. Rather, there is a retroarch.cfg file for each system located in \\retropie/configs/(system) that can be set up to override the global one. Note that, as with the ROM folders, you can delete the config folders for any systems you won't be using.
By default, the system-specific configuration files will look like this:
 There's a reason that this design has barely changed in 20 years
 A common use for these system-specific configurations is controller input overrides. Below is an example of one for a 2-button system (i.e. NES) to use Y/B instead of B/A:
input_player1_b_btn = 3
input_player1_a_btn = 2
input_player1_y_btn = 1
input_player1_x_btn = 0

input_player2_b_btn = 3
input_player2_a_btn = 2
input_player2_y_btn = 1
input_player2_x_btn = 0
Alternatively to the above, you can create a "core" remap file through the Retroarch menu. This can make things a lot easier when creating game-specific remap files for that system, which is particularly recommended for the Sega Megadrive Genesis since its button usage standards were... fairly nonexistent, to say the least.
Next, we'll take either the L2 or R2 button on our PS controller and change that to the "turbo activate" button for our SNES emulator (NES has the somewhat more preferable option of using X and Y for this purpose and the GBA emulator does so by default). We can't use any of the other buttons for reasons that are hopefully obvious, but there's no problem with this sharing a hotkey button since only retards and Acclaim design games that require you to mash select.
(Similar to the hotkey issue earlier, the above option exists in the global config file but won't work without adding the "_btn" suffix.)
Sega's controller had some kind of weird three/six-button thing going on with it where the original controller had three awkwardly-placed face buttons but eventually they realized it was stupid and put out one with six awkwardly-placed buttons that not a lot of games used. I don't know, I never played the Genesis as a kid; I was a member of the SNES master race (fight me). Anyway, to get the emulator to map all six button instead of just three, you'll need to put the following line(s) into Sega's retroarch.cfg file:
picodrive_input1 = "6 button pad"
picodrive_input2 = "6 button pad"
 Now let's go play a game where every button does the same thing
 We can also adjust the default volume level since not all emulators are created equal and will be louder or quieter than others. Here is what we'll place in the PSX config to bring it down (roughly) to the level of the other emulators:
Next, we'll look at forcing an aspect ratio of 16:9 so that games will fullscreen on modern TVs. By default, games will run in their native resolution, which is usually 4:3. This option is a matter of taste for some people with rather strong opinions on stretched images (probably the same weirdos who spend 100 dollars on gold-plated audio cables), but my take is that it looks better on most systems to not have giant swaths of wasted screen space. The one possible exception is Game Boy games, which are already super low-res to start off with and aren't done any favors by stretching them out, as any GBA owner can likely attest. Your mileage may vary; if you want to set this option globally, then just uncomment the below settings in the main retroarch.cfg file (delete the # at the start of the line).
(Note: the 16:9 ratio is specified by index "1" - there are other settings if happen to own a TV that's hideously deformed)
 Of course, some games will just look like ass either way.
Why is Batman holding a gun?
Of course, some games will just look like ass either way.
Why is Batman holding a gun? The one setting I do recommend setting globally is video smoothing, which may already be enabled by default depending on how the random number gods were feeling when you flashed your system. It greatly reduces pixelation and helps you forget how ancient some of these games are.
 ENHANCE! For the love of God, ENHANCE!
  Nice. But does it have
blast processing?
Nice. But does it have
blast processing? Find the below line in the main retroarch.cfg and make sure it's uncommented (again, just delete the #).
Finally, let's go over save files. Both the in-game save data (.srm files) and emulator-created savestate files (.state) are created in the same directory as the ROM by default. Although not really an issue for a system you don't ever intend to backend into again, this can make routine house-cleaning or sharing these files between different systems more of a hassle than it should be. Thankfully, these directories can be manually specified in the Retroarch configuration - my personal recommendation is the otherwise-empty (for me, anyway) "splashscreens" folder in the root of //retropie.
You can even take the above one step further by dropping the "/(SYSTEM)" and making it a global setting provided that you don't have any games on two different systems with the exact same filename.
retroarch-core-options.cfg
This is another config file located in \\retropie/configs/all that controls the core options for each emulator. Unlike with the above, we will be editing this file directly even though the edits will all be system-specific. The first thing we'll look at is allowing the NES emulator to bind the unused X and Y buttons to A/B turbo.
(At the risk of sounding like a broken record, "Both" is correct; "both" will not work.)
Next up, we'll set the palette for the Game Boy emulator to something other than grayscale. This involves changing the colorization setting to "internal" and then selecting a palette from the list of those available.
 "GBC - Blue"
  "GBC - Brown"
 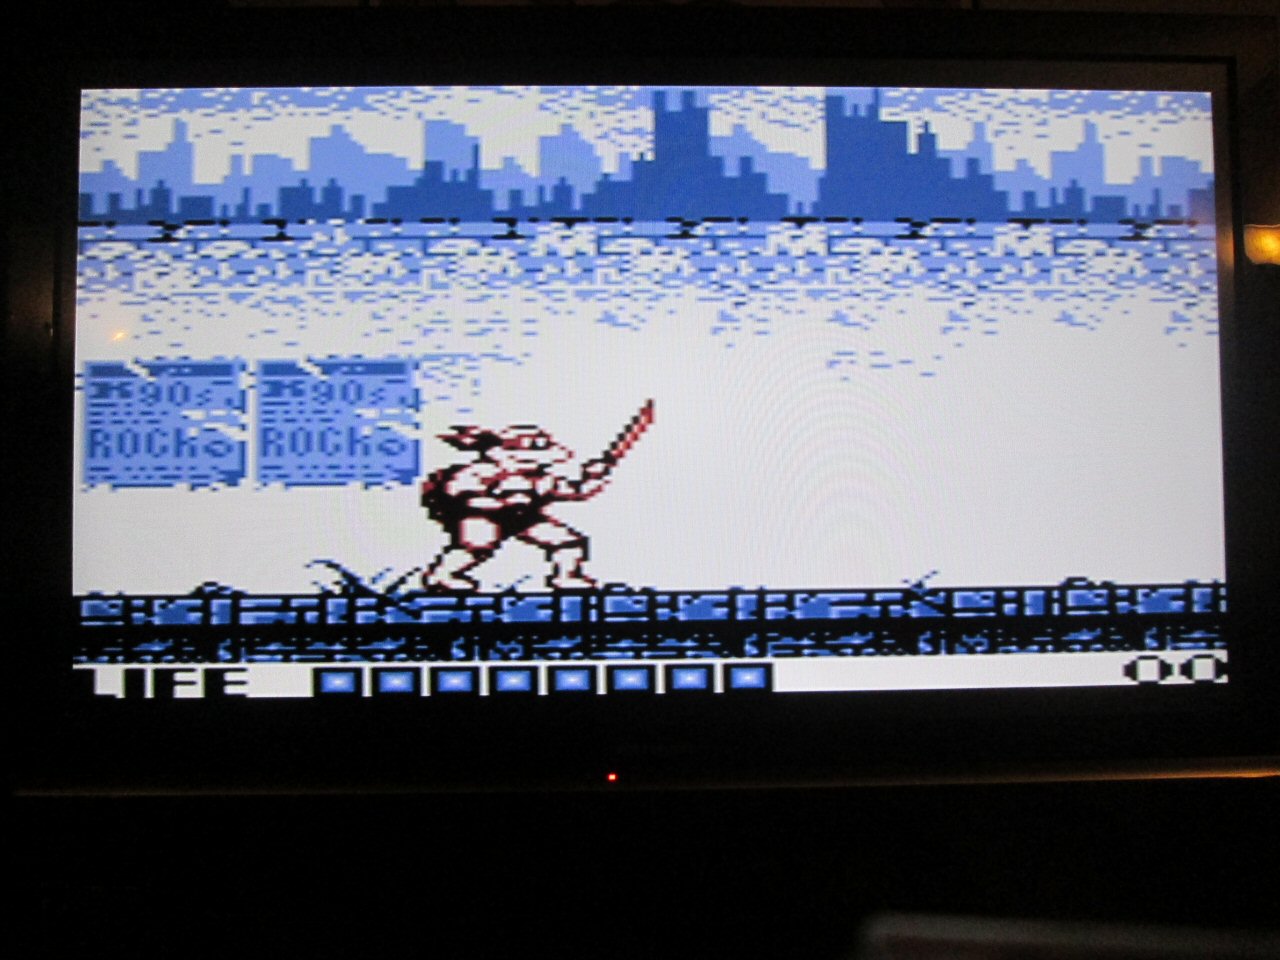 "GBC - Dark Blue"
 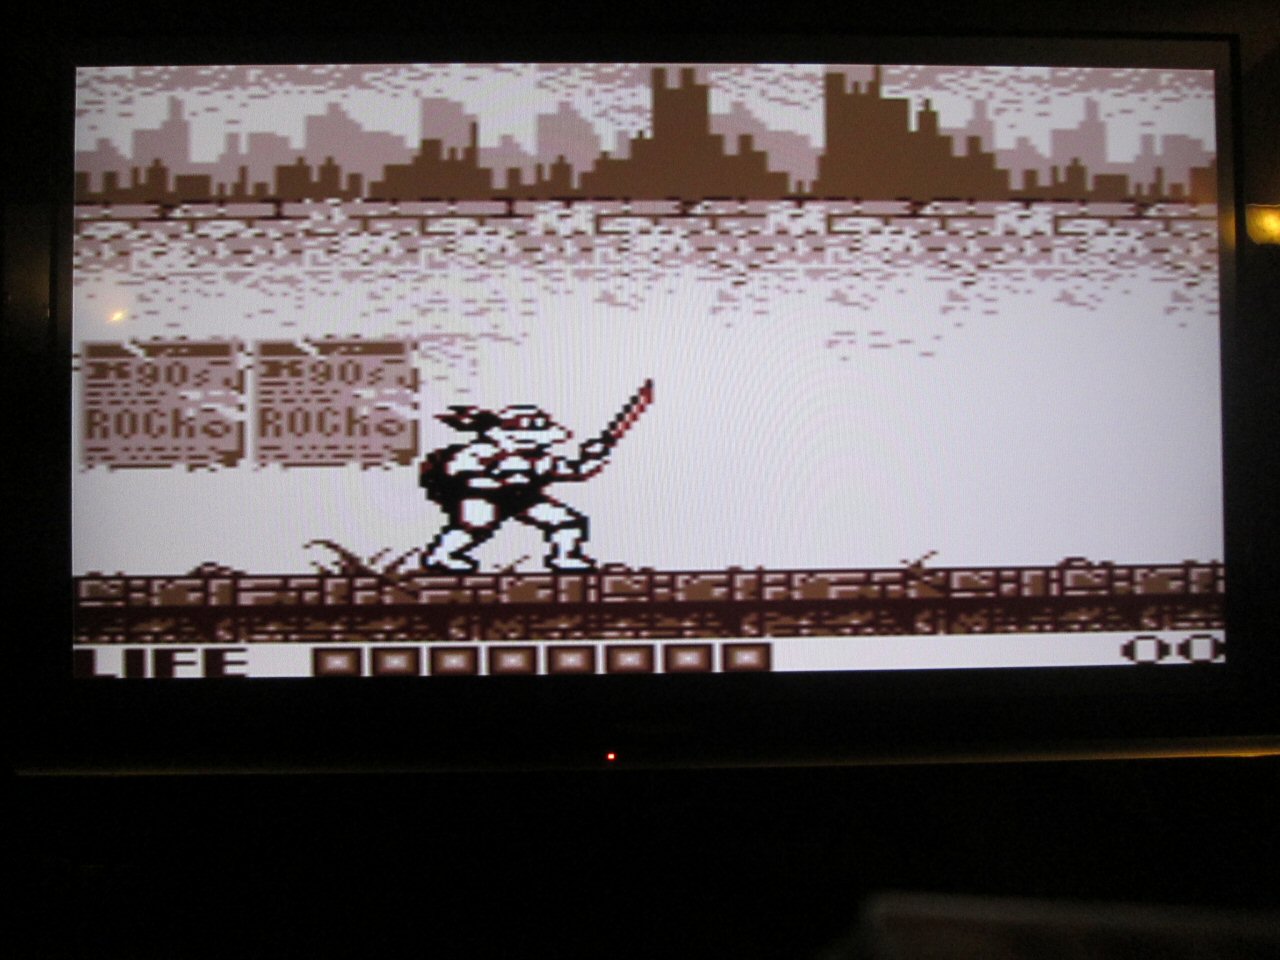 "GBC - Dark Brown"
  "GBC - Dark Green"
  "GBC - Grayscale"
  "GBC - Green"
  I WILL HAUNT YOUR NIGHTMARES
  "GBC - Orange"
  "GBC - Pastel Mix"
  "GBC - Red"
 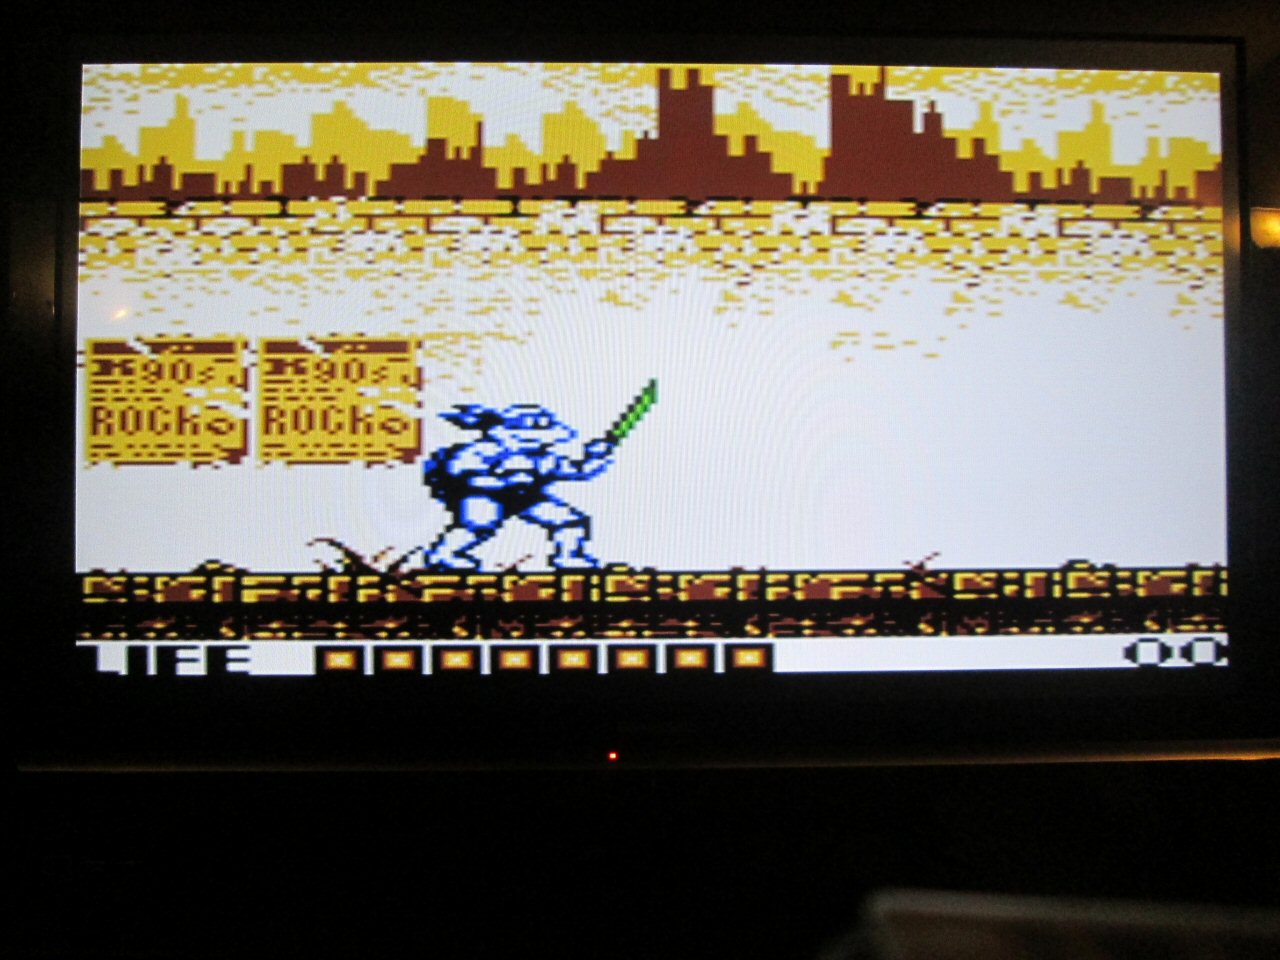 "GBC - Yellow"
 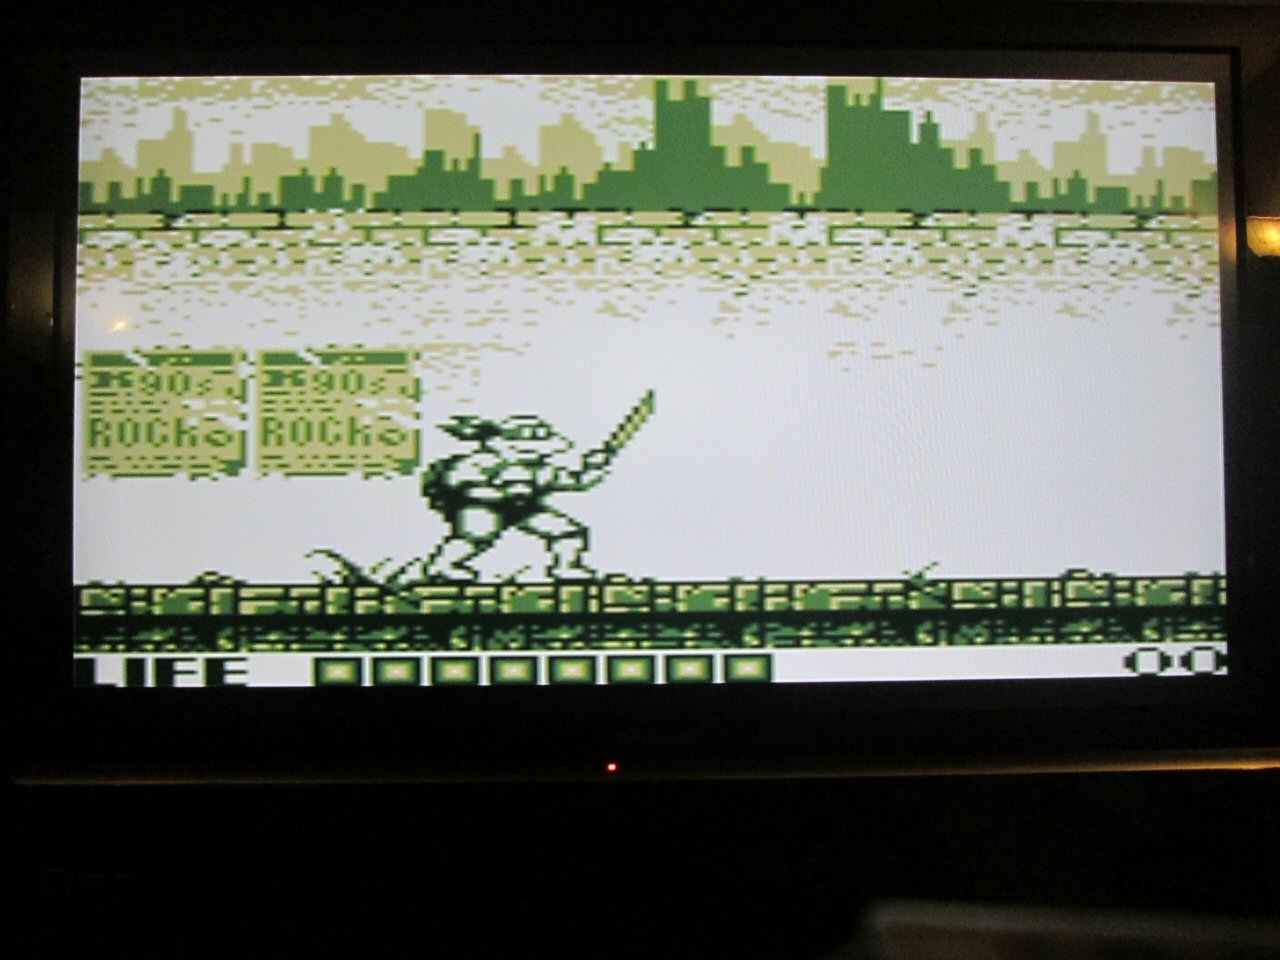 "Special 1"
 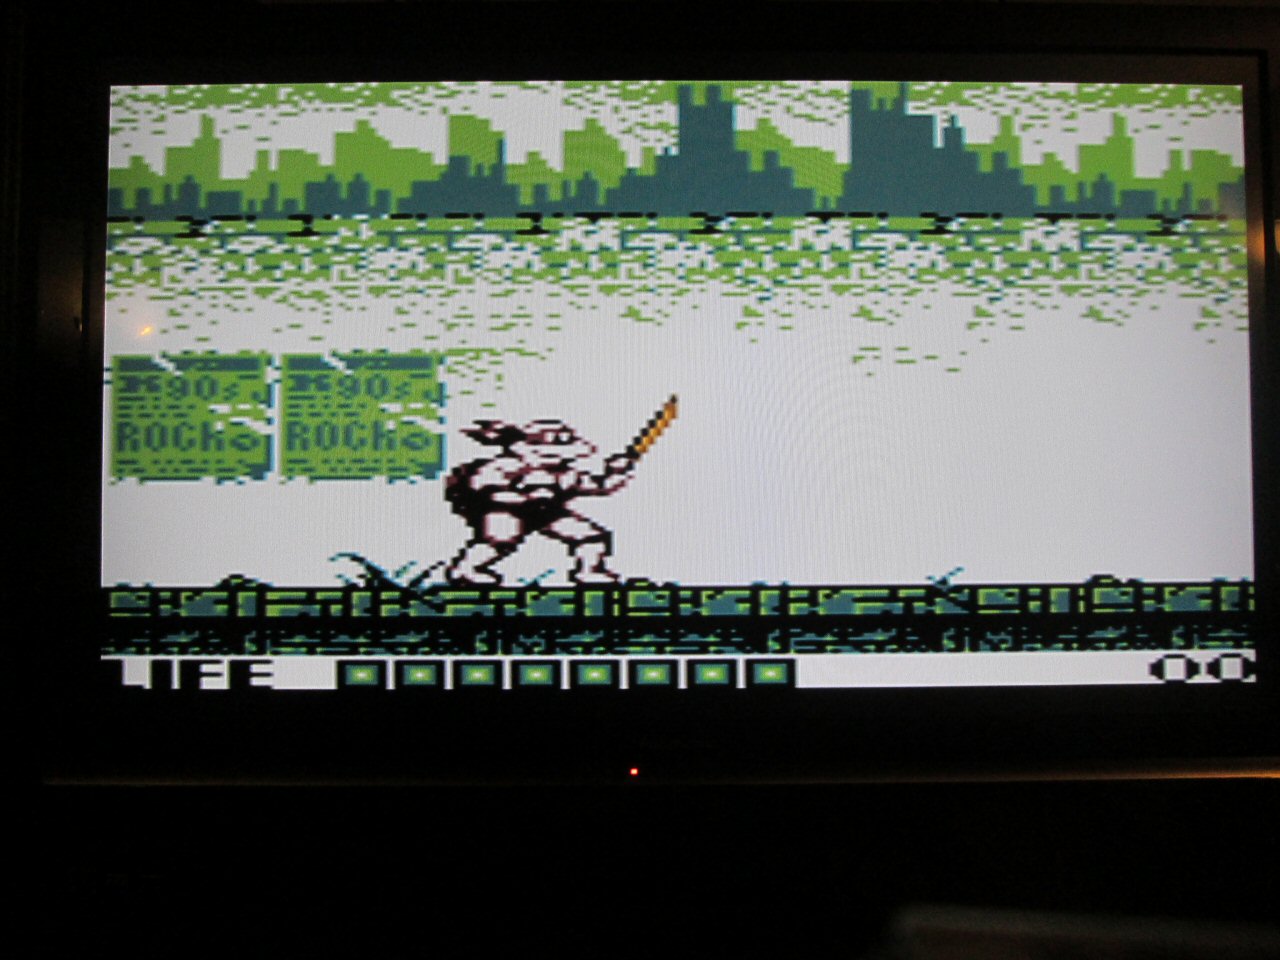 "Special 2"
 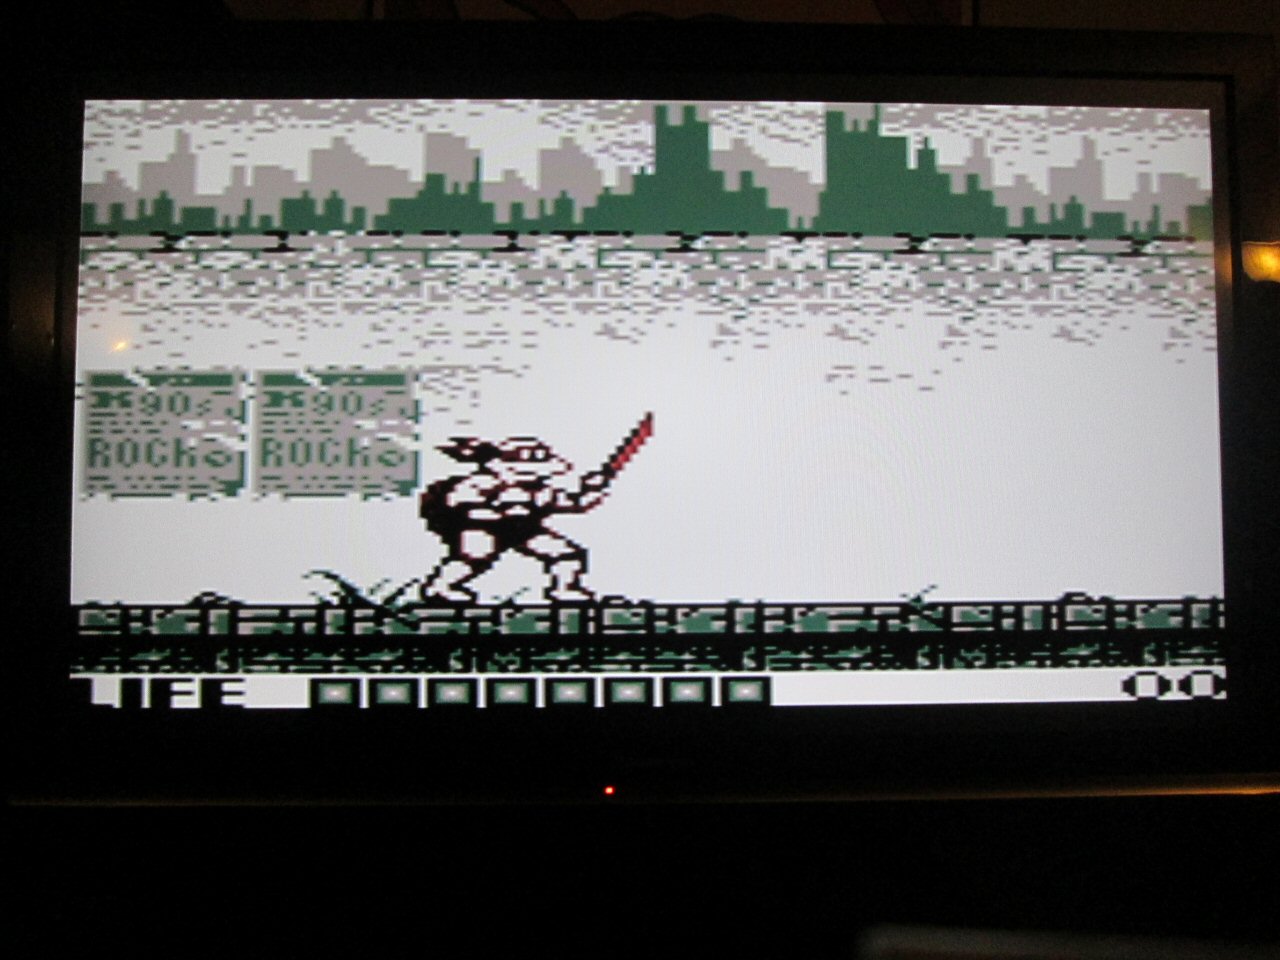 "Special 3"
 As you can see, most of the palettes look pretty terrible, with the pastel mix and inverted being particularly offensive. "GBC - Blue" is the default and honestly one of the better (if not more colorful) choices, but I prefer something a bit more subdued for my ultra-pixelated mess such as Dark Blue or the amazingly striking Special 3. Special 2 is an alternative if you want a bit more color, but Special 1 is pretty much just a recreation of the "pea soup" color scheme of the gray brick.
A common misconception about the Game Boy palette is that it was limited to only four colors, which as you can see here isn't exactly true. There is a separate palette of four shades each for sprites and backgrounds, and there is actually a second sprite palette that you can see utilized by some of the settings if you look at Leonardo's sword. This is where that mess about Metroid 2 having a "special" palette for the Super Game Boy & Game Boy Color because they were all made by the same development team comes from, which is more of a half-truth since all it did was make better use of that extra palette.
Moving on, the last thing we'll look at is some various graphics enhancements and fixes for PSX emulation:
The above may need to be tweaked in response to any issues that come up during gameplay; enabling the last option, for example, can result in flashing white bars on the top and bottom of the screen while playing Symphony of the Night. And clearly there is some possible downside that I'm unaware of to enabling the Parasite Eve 2/Inuyasha fix or else it wouldn't be optional in the first place. One persistent graphics issue that is as of yet unfixable is vertical lines appearing near sprites in some games such as SaGa Frontier (see below) and Breath of Fire III.
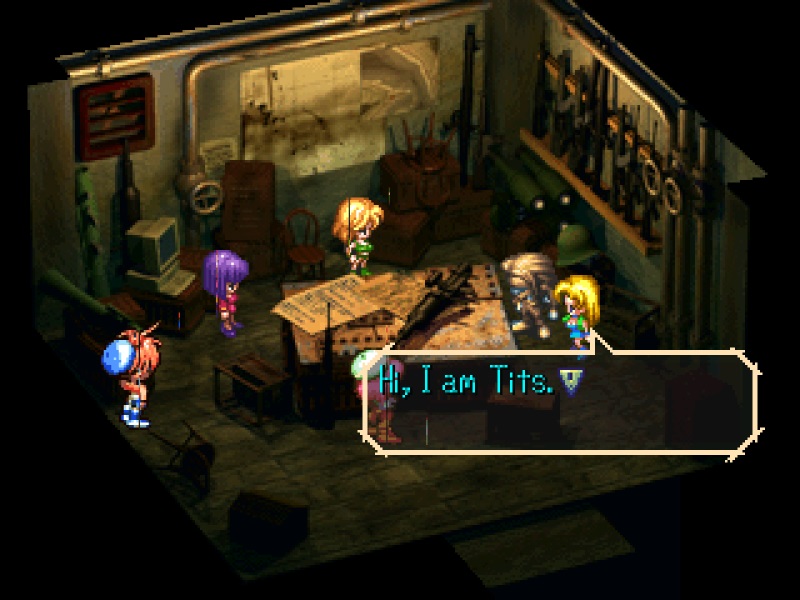 "...and this is my partner, FAGBALLS."
 N64 Configuration
Simply put, N64 emulation as a whole is still not yet at a good place. Games are very hit-or-miss as to whether or not they're even playable, and even at its best it tends to be rather... janky. As of now, I would recommend sticking to the original hardware if at all possible or emulating the PS version of multi-platform games. That said, there are some things that can be tweaked.
The first thing you'll likely notice about mupen64plus is that it's about three times louder than everything else and has no volume control, sort of like Donald Trump except nobody ever thought it would be funny if it ran for president and won. While the audio lacks the ability to be fine-tuned, we can bring it down to more nominal levels by changing the audio plugin in mupen64plus.cfg. In order for this change to be effective, we must also change autoconf.cfg to not auto-set the audio configuration, or else it will revert back to default as soon as we load up a ROM.
On the video side of things, we will generally get a bigger picture by switching the graphics plugin from glide to gles2n64. This will also allow us to stretch the image horizontally (if desired), although "true" fullscreen does not seem to be an option since even a stretched image will retain black bars on the top and bottom.
Finally, if you are indeed set on N64 emulation, might I recommend looking into overclocking your Pi?
Step #7: Warning Signs
Much like the "check engine" light on your car, a Pi has two big cries for help that it can display at any given time: a thermometer to indicate rising temperatures and a lightning bolt to indicate low voltage. In either case, the root cause is usually one and the same: you're putting too much stress on it and need to chill for a minute. The former can usually be resolved fairly easily by removing the top of your pi case (and/or by using one with good ventilation to begin with) while the latter tends to go away on its own provided you're not using your rig to, like, actually calculate pi or something.
A very common cause of both of the above issues is the use of shaders, even at very low levels, which is why I generally suggest running without them. Some games will run just fine, in contrast to the earlier-mentioned issue with Metal Gear Solid, but will put enough stress on your system to constantly trigger these warnings. If you encoutner such a game that does so while others on the same system do not (example: PSX Gauntlet Legends), I would advise you to skip it.
Step #8: Back That Shit Up
We spent a lot of time setting this up and even though we had a blast doing so, we really would rather not have to do so again. So let's back that shit up! Which method we go with will depend primarily on whether or not we copied our internal file structure from the SD card to a USB drive. If everything is still on the SD card, backing up your system will be as easy as plugging the SD card into your laptop or PC and using Win Disk Imager to create an image file from it.
If, however, everything has been moved over to a USB drive, then it will be most efficient to simply back up all of the files we've added to/edited on it and retain a copy of the base RetroPie OS image handy. This will allow us to do a full system restore/creation by doing a clean install on the SD card, transferring the internal file structure over to a USB drive, and then copy all of our backed-up files to the USB drive when that's finished.
Appendix: Further Resources
For maximum 90's feel, we'll pretend that GameFAQs isn't a thing yet and instead resort to asking our friends on the playground about how to find mew underneath a van after the S.S. Anne leaves or about how to revive Aeris/General Leo/anyone you ever liked on a Joss Whedon show. This can prove difficult in some cases, however, since instruction manuals and other supplemental materials mysteriously vanish in the process of "legally" creating your own ROMs. There are many sites out there, such as ReplacementDocs that attempt to remedy this problem, but none of them have anything close to a complete database rendering it a right pain in the ass to find what you're looking for in most cases.
Of course, you could just go ahead and download my collection:
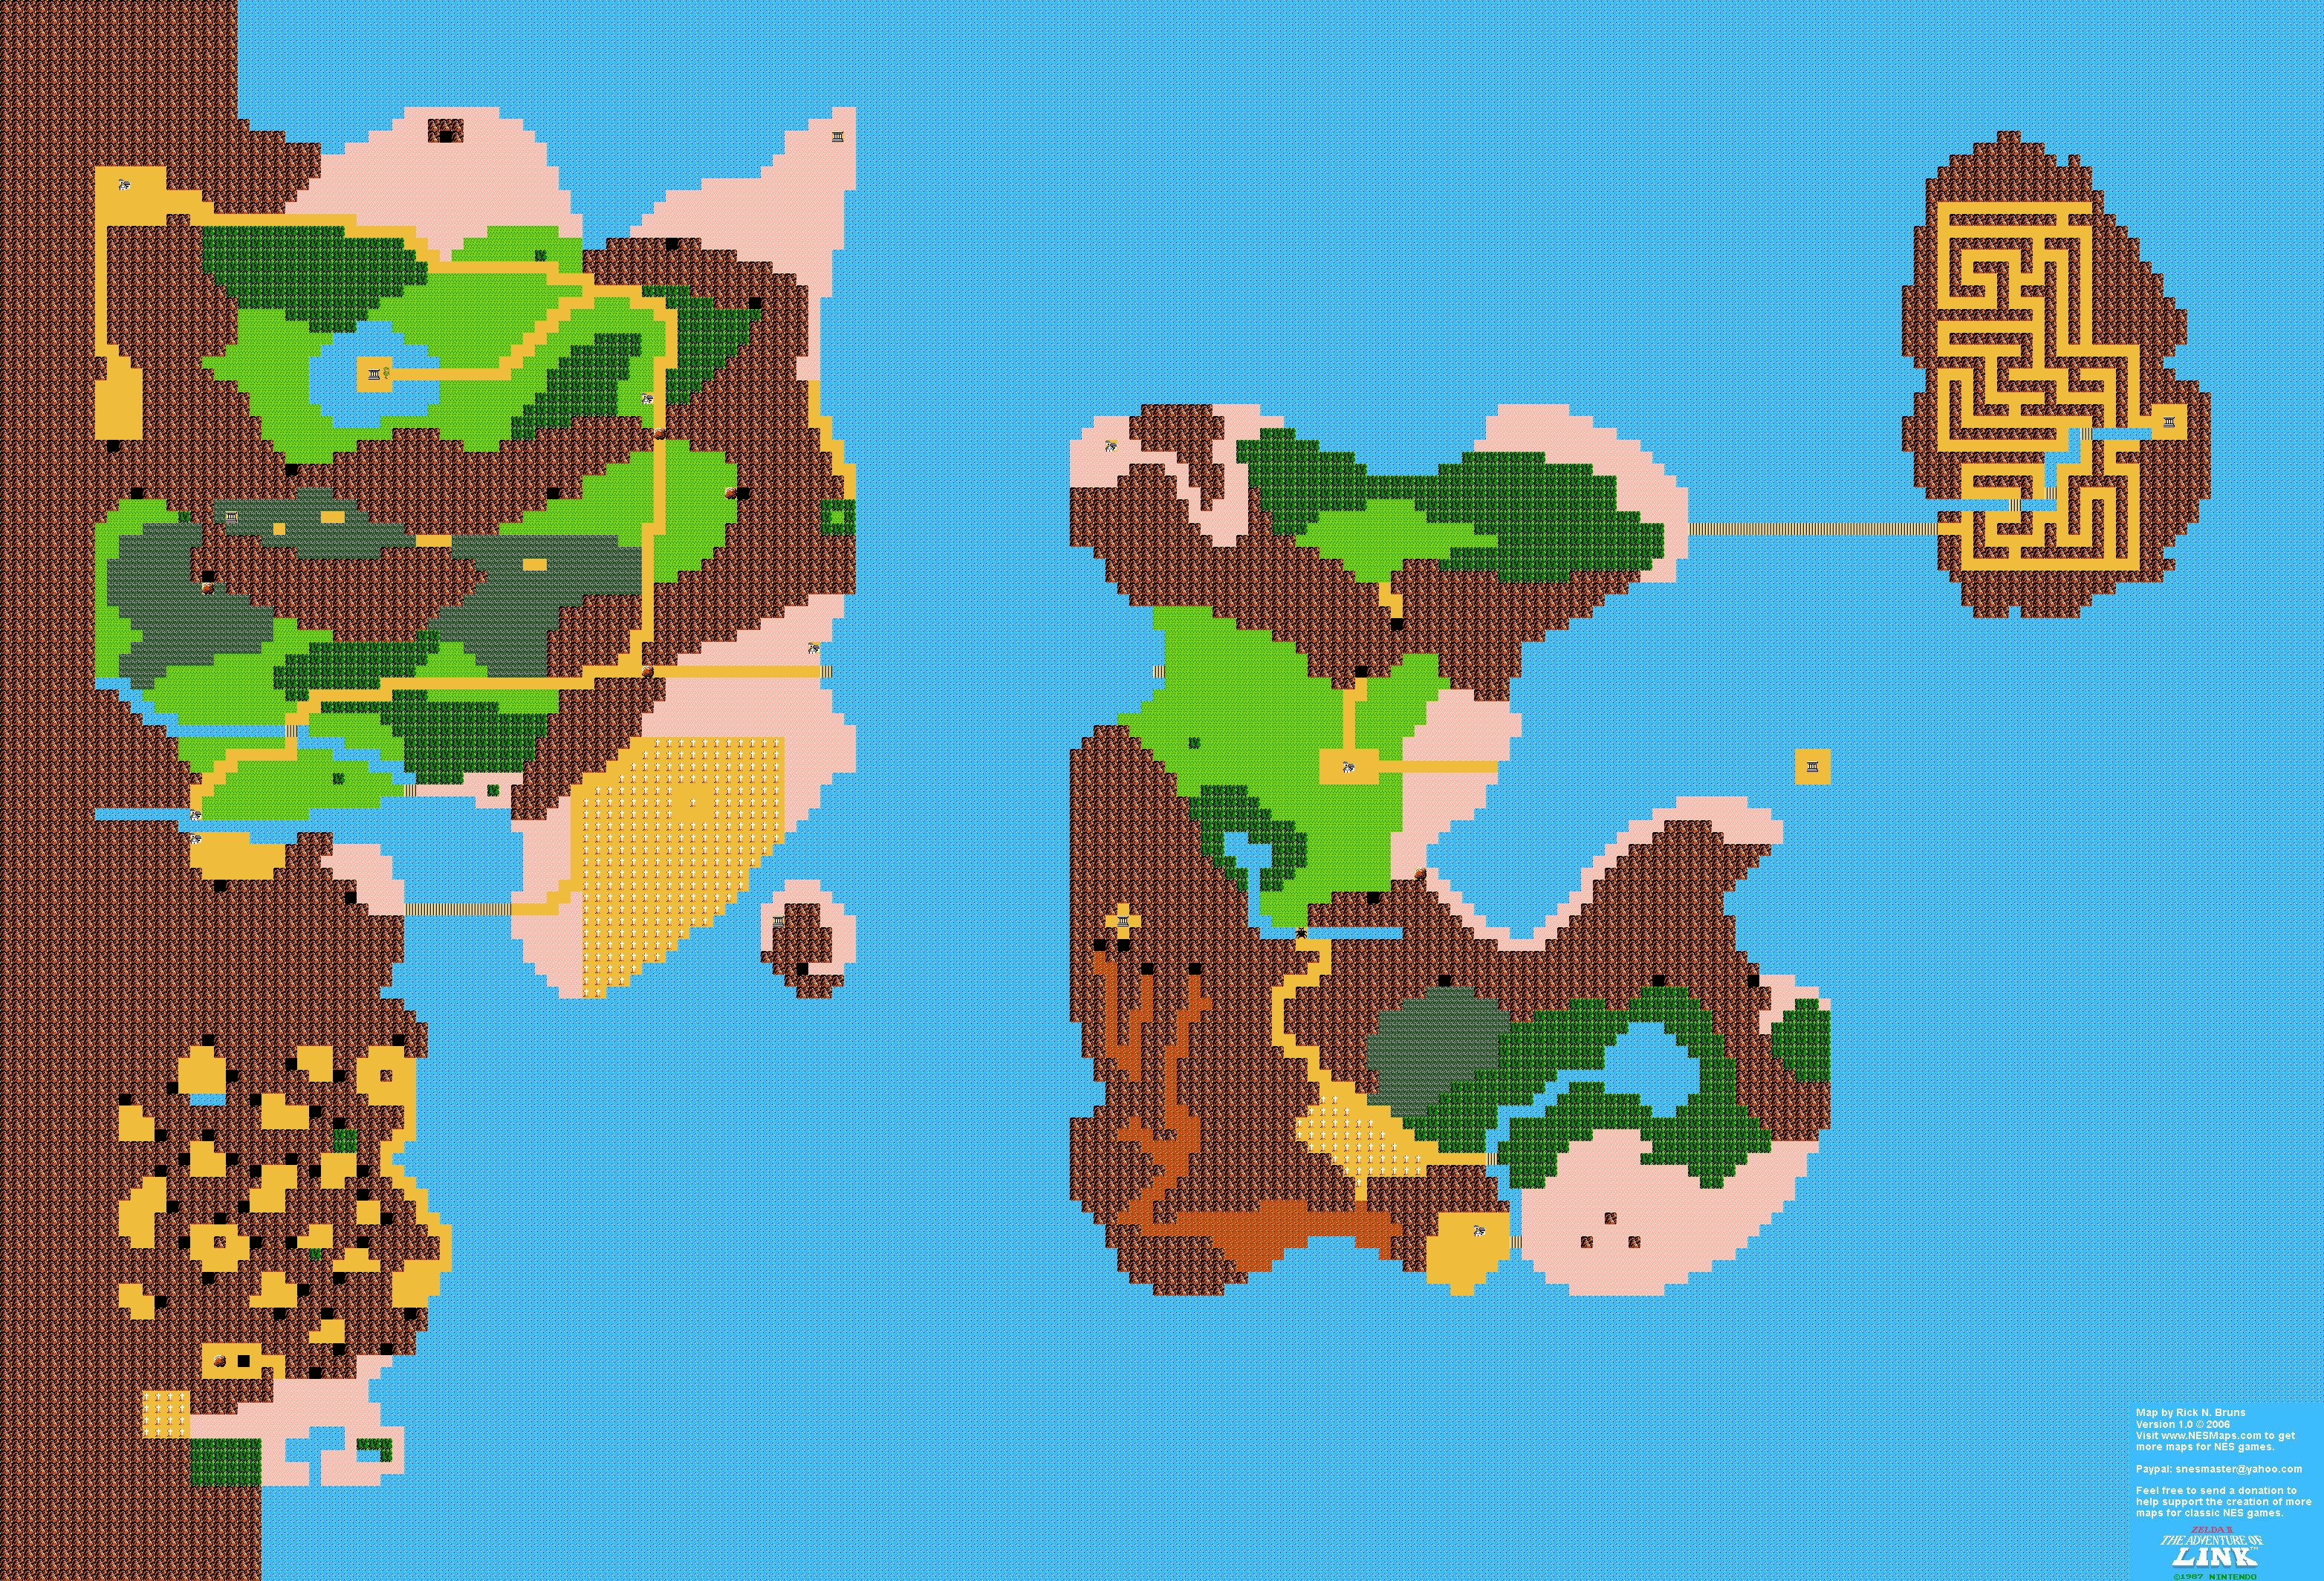
For further reference, see VGMaps for all of your cartographical needs and Sega Retro for pretty much anything else Sega-related. For more romhacks than you can shake a stick at, look no further than Romhacking Dot Net. If you'd like to support homebrew developers that are still making NES games to this day, check out Battle Kid and it's excellent sequel.
I can usually be found around the Discord for another modding site called New Game Plus, and just because I haven't plugged it enough yet, there's a Final Fantasy VI mod that you should really look if you like good games.
Also, something something Swedish redheads.